LiFePO4 (Lithium) Battery Build (part 3)

In part 2 I talked about my basic 12V setup and how I was top-balancing my new battery cells. I didn’t get into why to top-balance, but there’s an excellent explanation in the DIY Solar Forum – basically each cell is independent and we’re trying to equalize them and maximize the capacity of the pack. I more or less followed Will’s instructions which are also in the forum. However because my cells started out very close to the same voltage (within 0.001V), and my power supply is limited to 10 Amps, I just wired up my BMS and set it to 14.4V/8.5A and let it go. Even still it took ~24 hours to charge, implying the batteries arrived with about 30% charge.

After a few hours of charging…

Eventually the cells start to diverge as they get near the top. Once this happened I re-wired in parallel, set the charger to 3.6V and 8.5A and let it go for the night. (Despite only only needing a few amps, at the top of the charge curve the power supply goes from constant current of 8.5A to constant voltage of 3.6V with a very low Amp rating (1.5A or less).

The last 10A took seemingly forever.

While the cells were charging, I started building the battery box to store (and protect) the cells, as their aluminum enclosures are relatively thin and there are quite a few wires and other electronics required. My goal was to build the main box in such a way that I could “drop” the compression frame with the cells and wiring inside. (Side note: Because LiFePO4 doesn’t tolerate cold, and also I’m not building a IP67 waterproof box, the final battery pack will need to fit inside the trailer in the cabinet underneath the fridge).

The batteries are sit inside a compression frame with the BMS mounted on the right side and a 150A fuse on the left. The frame drops into the box cleanly and applies light pressure to the cells via threaded rod and lock nuts on the ends. An ideal compression frame applies roughly 12psi evenly at all battery states, but the complexity of spring-loading the end plates was too much. Since my battery will stay at 70-90% SOC most of the time I just compressed for that.

Box finished and battery fully charged!

It’s not fancy but since it will be hidden in a cabinet under our fridge, who cares?
Final charge state.

Last step once complete was installation in the camper. I spent quite a bit more time on Sunday than anticipated re-routing the wiring for the solar charge controller and the main battery circuit. However it’s up and running now, with I believe only some minor tuning of the solar charge controller required to limit the battery charging to ~90% in order to extend the battery life.

First trip will be this weekend and we’ll see how it goes!

LiFePO4 (Lithium) Battery Build (part 2)

In my earlier post, I talked about what LiFePO4 batteries were and why I went with them. In this article I’ll cover how I built mine, which should allow most savvy DIYers to more or less repeat the process, building on what I learned. Most of what I learned about LiFePO4 batteries was from the DIY Solar Forum – if you’re truly interested in building your own battery I suggest reading the discussion forum there as well.

One note before I get started – this information is a general overview of what I did, how, and why. However, every battery is different (even LiFePO4, where different manufacturers may use different chemistries to construct their batteries) and every tool is unique. Furthermore, what worked for me might not work for you, and it’s entirely possible I omitted some critical details either accidentally or intentionally (for clarity). If you have no understanding of batteries or electronics and try to follow this step by step and end up blowing up your battery or burning down your house, that is not my fault. Build (and enjoy) at your own risk – part of the fun is learning as you go along.

The largest cost for this project are the battery cells. Right now, decent quality 280Ah cells cost about $100 each from Alibaba or AliExpress, but you’ll need 4, and shipping from China is slow and expensive. Buying cells from China is also a bit risky – some suppliers will buy and re-brand cells, some will sell used cells, and some cells are lower quality (Grade “B” or “C”) or are “unmatched” (very different internal resistance or capacity). Shipping times vary greatly, and not all sellers will do a good job packing your cells so they may arrive damaged. AliExpress (and Alibaba, I think) offer delivery and other buyer guarantees, but in most cases you’ll need to ship the cells back to the seller at your cost to get a refund. Using a credit card with a good buyer protection policy is really important.

4 well-packed batteries arrived

All said I did a little research, but I also got a little lucky with my purchase from the LiitoKala store on AliExpress.

LiitoKala says 280Ah but the QR code says these are 867Wh @ 3.2V which is only 271Ah. I’m not yet sure if CATL de-rates their batteries a bit or if LiitoKala is stretching the truth.

The next major cost is your battery management system (BMS). While it’s technically possible to build a battery without a BMS, it’s generally a terrible idea and you should not do it. A quality BMS will provide a number of critical protections which will prevent you from destroying your very expensive battery cells quickly, including:

  • Low voltage cutoff (<2.5V) to prevent you from draining your battery below 1%.
  • High voltage cutoff (>3.65V) to prevent you from overcharging your cells
  • Temperature cutoff to prevent you from destroying your battery by trying to charge it below 0C or discharge it below ~20C, or conversely from trying to charge or discharge above 55C)
  • Automatic cell balancing, to ensure that all 4 cells keep the same voltage. This will slowly “steal” power from hotter (higher voltage) cells and trickle it to lower voltage cells, which maximizes your cell capacity and performance.

Since my BMS is rated for 120A, I built my battery to handle a continuous load of 120A. While I don’t have a 120V inverter right now, this allows me to add one up to 1500W to my camper at a later date without changing the battery. To handle 120A continuous load, I used three 8 gauge wires or heavy duty busbars for all connections. Note that 10AWG wires can carry up to 40A so three of them should handle 120A, but I believe in engineering a margin of safety into my design so stepping to 8AWG, which can handle 55A, ensures my battery wires will not overheat.

Parts

  • (4) LiFePO4 280Ah cells @ 3.2V (Currently $450 from the LiitoKala store on AliExpress).
  • Overkill Solar 4S 120A BMS. (Overkill buys Xiaoxiang BMS, tests, configures, and re-brands them. I purchased the Xiaoxiang BMS from an eBay seller in the US for $105. You can get them cheaper off AliExpress, but I recommend paying a few extra dollars and buying one from Overkill Solar which has been tested and has a warranty).
  • 150A fuse ($9) as your last line of defense in the event of a short
  • Heat shrink (various sizes) to help protect and strengthen your crimps (about $5)
  • Good quality 8AWG wire. I had some available but if you don’t then just buy a spool. Make sure you get real copper, not copper-clad aluminum (CCA) which has a much higher resistance
  • 8 AWG lugs and 10 AWG lugs for battery terminal crimping. The battery terminals are M6 (6mm) and so 1/4″ battery lugs (6.3mm) will work. I needed six 10AWG lugs just for the BMS as mine came with 10AWG pre-soldered. If you bought the Overkill BMS with M6 terminals you’ll need double the number of lugs, and in that case I recommend using all 8AWG wiring. I use 8AWG for all other internal wiring, which means I needed 12 for the positive wiring as well – three 1/4″ for the positive M6 battery terminal, six 5/16″ for the fuse, and three 3/8″ for the exterior battery stud. Expect to spend about $20 on an assortment of sizes
  • If you go with the Overkill Solar BMS you’ll need 5 ring terminals to wire the leads. I used the red 18-22AWG ones with 1/4″ rings and I soldered the ends to make them thicker since I think the wires are even smaller ~26AWG.
  • Fiberglass strapping tape,($7) which is not strictly required but helpful to secure various things together (like attaching all 4 batteries)
  • External battery studs ($20) to make connecting your RV wiring easy.
  • I ordered a battery box ($15) from noco.com but then learned that you really should put your batteries in a compression frame, so ultimately I built mine out of some 1/4″ and 1/2″ birch plywood. I may still use the lid…
  • Some M6 “grub screws” (aka set screws) for $10, which you can permanently fix in the battery with some Loctite ($5). Throw the screws your battery comes with away – you can’t torque them properly anyway.
  • M6 washers, lock washers, and lock nuts. Home Depot or Ace Hardware have bags of these available. Don’t rely on a nut alone – always use a lock nut and/or lock washer.
  • If you’re building a compression frame, you’ll need some 1/2 plywood and four pieces of 1/4″-20 threaded rod about 18″ long, with 8x washers and lock nuts.

Tools

The following were things required that I didn’t own. If you have this stuff already, then great. If you don’t have screwdrivers, wrenches, a heat gun, and other miscellaneous tools then you’ll probably need to order those too.

  • You’ll need a Variable/Adjustable DC bench power supply in order to top-balance your cells. I bought the 30V/10A version and I’m really glad I did as even this one can take a couple days to fully charge your battery. Technically your BMS will probably be able to top-balance for you but at 30mV or less it could take weeks or months to complete if your cells do not arrive matched, and if they’re really far off it’s possible it might never complete.. If you want to be able to easily balance your battery and to be able to fully charge, then fully discharge, then properly re-charge your cells to confirm their capacity, just spend the $60.
  • A constant current load tester. I used one that runs $15 but you could do this with a 12V lightbulb or a bunch of resistors if you can measure the amperage accurately with a shunt.
  • A reliable multimeter.
  • I recommend a torque wrench designed to measure in/lbs, since if you overtighten your battery terminals you’ll strip them and end up very unhappy. They’re under $20 and often referred to as a “bicycle torque wrench” so you may find other uses for them in the future.
  • A decent wire crimper able to do anything 8 to 22AWG (or better)
  • Decent wire strippers. A heat gun (or aim-n-flame) will help with heat shrink too.

Step 1: Battery Cell Balancing

If you’re patient, the preferred method for doing the initial battery cell balancing is to connect the batteries in parallel (all + on one side, all – on the other), set the bench power supply up, adjust it to 3.6V and max Amps (or really 80% of max, just to preserve the power supply), and let it go until the Amps drops to 0. In fact that’s what I went to do at first. However my cells arrived with 60% charge (which is pretty typical) reading about 3.25V, which means I needed to put 112A in each battery to fully charge them. Even at 10A, that’s 44 hours… and the thing about batteries is that as you get the voltage closer to the current will drop to keep the voltage constant.

Cells wired in parallel in a (temporary) compression frame. If you don’t compress the cells slightly, they may swell.
Power supply set to 3.4V and 8A, but once connected to cells which are 3.3V it switches from a constant 8A current to constant voltage, and the current drops off precipitously.

Rather than let the batteries sit on the charger for days, I decided to wire them in series, set up the BMS, and then apply a ~12V charge to the battery pack. This has the advantage of “only” needing to apply 112A to the pack, so it should take 1/4 the time. My expectation was that the cells were already matched (and probably balanced) within 0.01V so the BMS would take care of any balancing for me.

I set the power supply to 14V (which is 3.5V per cell) and 8A and let it run. Since I’m running through the BMS I suppose could just set it to 14.4V (3.6V per cell) or 14.6V (3.65V per cell) and count on the BMS to manage the cell voltage correctly, but since this is my first top-balance I wanted to give the BMS enough time to be able to balance the cells if they get too far out of whack as the voltage ramps up. I’ll repeat the process at 14.4V (3.6V per cell) once I’m sure the cells are balanced at 14V (3.5V per cell), or I’ll temporarily disconnect the busbars and individually top off a single cell if required.

Basic 12V (4S or “4 battery Series”) wiring
Overkill Solar’s wiring diagram, also available on their website
Cells re-wired in series. and charging much faster now. Eventually once it’s charged I’ll cut down the threaded roads and build a (smaller) permanent battery box.

Stay tuned for part 3

LiFePO4 (Lithium) Battery Build (part 1)

Our camper (travel trailer) has a typical 12V lead acid battery to run most of the devices. Solar does a decent job of keeping the battery topped up, but sometimes we end up in a campsite with a lot of shade and have been finding it increasingly hard to keep the battery sufficiently charged for 4-5 nights. This is particularly pronounced when we get up in higher elevations and will often run the heater at night to keep the temperature tolerable.

We’ve tried AGM batteries in the past but they’re roughly 2x the cost of a regular “wet” cell and don’t really provide much benefit. Honestly just replacing the $99 “deep cycle” battery every couple years has been more cost effective, though it rarely provides any major energy storage benefit. (Except the one time I killed a battery in Big Bend by running too many fans and draining it down to 10.5V overnight…)

I’ve been debating a lithium-based option like the Renogy or Battleborn drop-in LiFePO4 batteries for a while, but at $900 the price is steep for only a bit more capacity. Recently though a friend of mine turned me on to the DIY Solar Forum, where a bunch of people were building their own high capacity lithium batteries for a fraction of the cost. I did the math and decided to make the plunge, which ultimately led me down a rabbit hole in an effort learn everything I could as quickly as possible so I could build and test one before our next long summer trip.

This post has a number of acronyms or terms, which may be used interchangeably at times, even when the meaning isn’t 100% identical. Terms like:

  • SLA = Lead Acid battery (even for wet cell batteries which aren’t sealed). This is probably what’s in your car.
  • AGM = Absorbent Glass Mat battery (it’s like an SLA but actually sealed)
  • LiFePO4 is one of many lithium battery chemistries
  • Lithium Ion = LI = Li-ION or LION, which is a specific battery chemistry, probably in your cell phone
  • Lithium in this post refers to LiFePO4, even though it’s a generic term for all Lithium-based batteries
  • V = Volts
  • Ah = Amp hours. In a 12V battery, 10Ah means you can power a 12V device that draws 10A of current for 1 hour, or 1A of current for 10 hours. I will ignore battery efficient at low/high outputs

If you’re a purist, get over it.

Why Go Lithium?

Cheap lead acid batteries are available at Sam’s Club or Walmart for about $100. My last two Duracell 105Ah batteries came from Sam’s Club. They work, but unless you’re regularly on shore power or run a generator in my experience it’s really hard to get enough capacity from them. This is due to a few reasons.

First, the cheap “deep cycle marine” batteries in my experience are really inferior to high quality deep cycle batteries. I’ve read this is due to thinner plates, the use of recycled materials, etc. I can say from experience though that after two seasons, even with good maintenance practices, these tend to only have 70-80% capacity remaining. High quality AGM deep cycle batteries seem to hold up better over time (except when you completely drain them… d’oh!), but are roughly double the cost at $200-250. Lithium chemistries, on the other hand, are known for lasting thousands of cycles – the typical LiFePO4 battery will still have 80% of its capacity after 2000-3000 cycles, or roughly 7-10 years.

Second, you can use much more of your lithium battery capacity safely. Lead acid batteries should really not be discharged below 50% (though I will go as low as 30% sometimes), whereas lithium can be fully charged and discharged (though the manufacturers recommend keeping and using them in the 10%-90% range. Thus a 100Ah lead acid battery only has maybe 50-70Ah usable, whereas a 100Ah lithium battery is designed for 80% utilization but can be cycled up to 100% if desired.

Third, lithium chemistry batteries weight a LOT less than lead acid. Don’t believe me? Go check your periodic table. That $99 100Ah Duracell is 59lbs, while a 280Ah LiFePO4 battery pack (without the case) is only 50lbs.

So in short I expect given roughly the same space (Group 31 battery size) and weight (60 lbs) to normally have about 4x the usable capacity (230Ah, assuming 10-90% state of charge) vs the old lead acid battery (roughly 60Ah usable). [Note: If I fully cycle the LiFePO4 battery that’s 280Ah, and if I compare that to deep cycling the SLA battery that’s 70 or maybe 80Ah, so I feel the ~4x ratio holds].

Why Not Go Lithium?

There are really only a couple reasons not to do this. The first and most obvious is cost. While the actual cost to build a lithium battery with 4x capacity is on par with purchasing 4 high quality AGM batteries, in practice the latter doesn’t really make sense for me to do because of the weight and space required. (Also because I really don’t *need* more than ~150Ah of lead acid capacity).

The other reason is battery management. LiFePO4 batteries in particular don’t like being charged below freezing or discharged significantly below. In fact, charging your LiFePO4 battery when the cell temperature is below freezing is known to destroy them quickly. To compensate, the battery will need to be relocated inside the trailer and will need a battery management system. More on this in part 2…

Converting a Magazine Rack to a Liquor Cabinet

This is one of my favorite modifications I’ve made to our new trailer so far.  To be fair, I got the idea off the Lance Owners of America forum.  While my work is specific to our 2015 Lance 2185 trailer, I suspect the mod would be similar in other models as they all seem to have this cabinet.

Lance ships their campers with a shallow “cabinet” that has a clock and two built-in magazine racks.  I’ve read a few posts where people store flashlights, batteries, tools, dirty laundry, and other random assorted items in them (though ironically nobody seems to actually use them to store magazines).  For us they just seemed like a waste of space, and while the Lance has a decent amount of cabinet space, as anyone who has ever lived out of a trailer or RV for a few weeks straight will tell you, there’s never enough cabinet space.

Since the inside of each cabinet section was about 12″ what I decided to do was move the curtain, take a circular saw, and cut out the front of the cabinet wall, opening up the space.  In preparation I purchased a 10 1/4″ wide x 26 1/8″ tall cabinet door from Lance for $45 (the same cabinet that is above the sofa/bed), and some miscellaneous antique bronze hinges and handles from Amazon.  The staff at Lance helpfully looked up the cabinet door information – apparently it is part # SD524A4 for my model.  Manufacturing took 2-3 weeks, and after a total of about a month the door arrived.
Once the door arrived I broke out the battery-powered saw and went to town.  The cabinets are 1/2″ think, so to avoid mangling the shelf I set my blade depth to just barely over 1/2″.  It turns out the shelf screws into the front of the cabinet, but I was able to pry the front off and some needle-nose pliers made quick work of the screws poking out.

To cover the cuts I made, I purchased some 1/2″ wide U-mounting from T-moulding.com, and glued them to cut edges.  The molding creates a small lip which made the door want to pop open, so I cut a small piece of excess molding to create a shim for under the hinge.

In the end the door fits nicely and seems like it should hold anything we put in it, even while bouncing around on the road.  I left a lip on the bottom of the cabinet so that anything I put in it won’t slide out, though when I finish converting the TV cabinet to a pantry I will likely use the positive-close strut from another cabinet on this one, just to be sure.

As to what to put into the cabinet, the bottles of rum, whiskey, and tequila should fit nicely on that bottom shelf.

2015 Lance 2185 Solar Installation

One of the best upgrades I did to our last camper was to install 200 watts of solar power in 2016.  That upgrade let us camp for weeks off-the-grid out west, where dispersed camping and most of the campgrounds don’t have electricity.  So when we bought a newer trailer this spring, I already knew what my first big upgrade was going to be.

On the old camper, I used a pair of 100W flexible solar panels and mounted them to the roof using Eternabond tape.  That worked OK, though solar panels lose efficiency as they get hot so when we should have achieved the most benefit at high noon in August in Moab, UT they weren’t actually any more effective than at 3pm in Illinois in May.  Also the protective laminate coating on the panels began to cloud up a bit and peel after the first year, degrading their effectiveness.

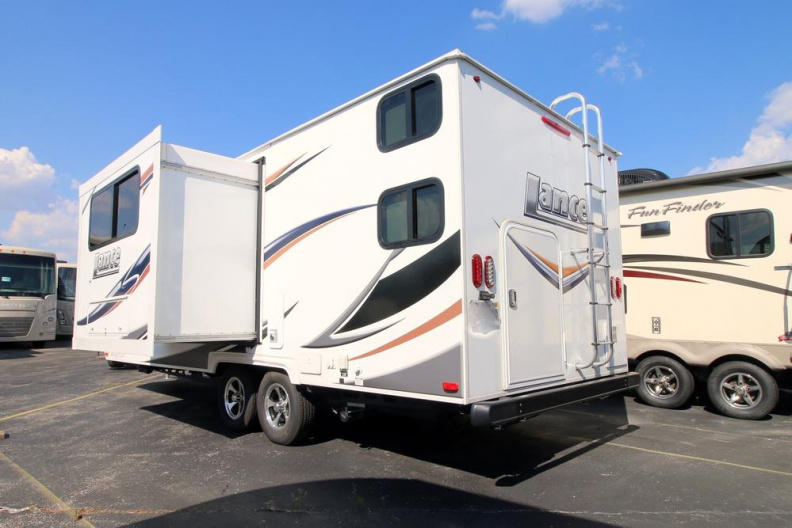
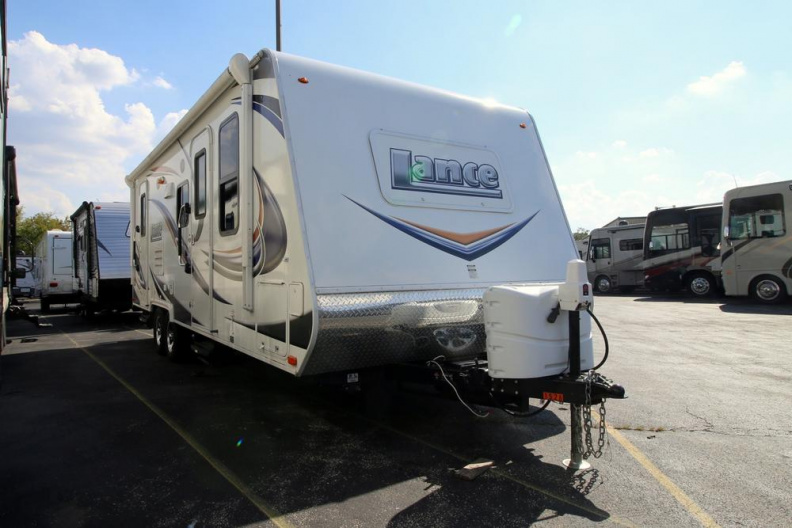
When I purchased the solar equipment for the Surveyor I never expected to have the camper for more than 5 years, but I intend to keep the Lance for at least a decade until all three kids are out of the house.  On top of it the 200W flexible panels were sufficient to go about 3 days in a cloudy environment before needing a full day of sun to recharge, but I wanted to be able to run indefinitely on our setup.  So with the new camper, I also wanted to install higher quality, higher efficiency, and more powerful components.

Equipment and Installation

To start, I ordered a pair of Newpowa 175W solar panels, and a Renogy Commander 40A MPPT charge controller, with remote monitor.  The Newpowa panels are monocrystaline and therefore slightly higher output (19.06V) than the comparable 160W polycrystaline Renogy panels, but are the same size.  That was important to me as it should allow me to use a different panel in the future if one becomes damaged or the Newpowa panels turn out to be garbage without moving the mounting brackets.  Monocrystaline panels are slightly higher voltage and therefore slightly more efficient in cloudy and low light conditions, which is a bonus, and the MPPT controller should be more efficient and provide better battery maintenance than the cheap PWM controller I used in the last camper.

Similar to the last camper, I wired the panels in parallel using 8AWG wire and ran everything through the roof to the charge controller mounted in the front of the pass-through, and then underneath the camper along the frame to the battery.  All the wiring was wrapped in plastic wire loom, and all entry points into the roof or floor were sealed with Dicor.

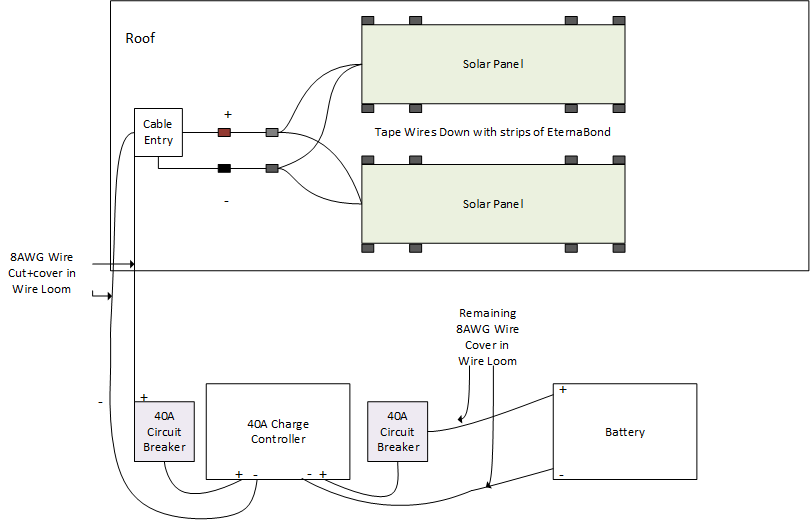
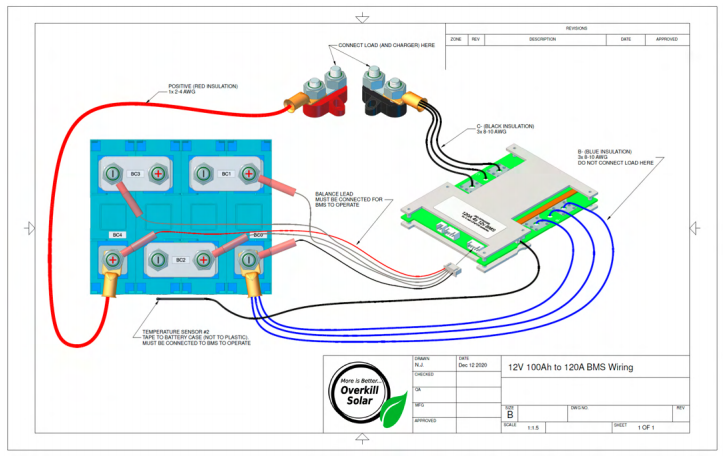
My simplified wiring diagram

Before getting started I contacted Lance customer service and they kindly provided a number of PDFs for my model year 2185 camper that I used to determine where roof studs, 12V, and 120V wiring were located.  If you have a 2015 Lance 2185 trailer you can download them from Lance Roof/Ceiling Schematic, or if you have another year or model just call Lance and they can provide ones specific to your roof.

I mounted the panels to the roof far enough forward to ensure that shadows from the A/C unit or other roof-mounted accessories were minimized, but I wanted to leave enough space that I could step to the front or outside of the panels if necessary.

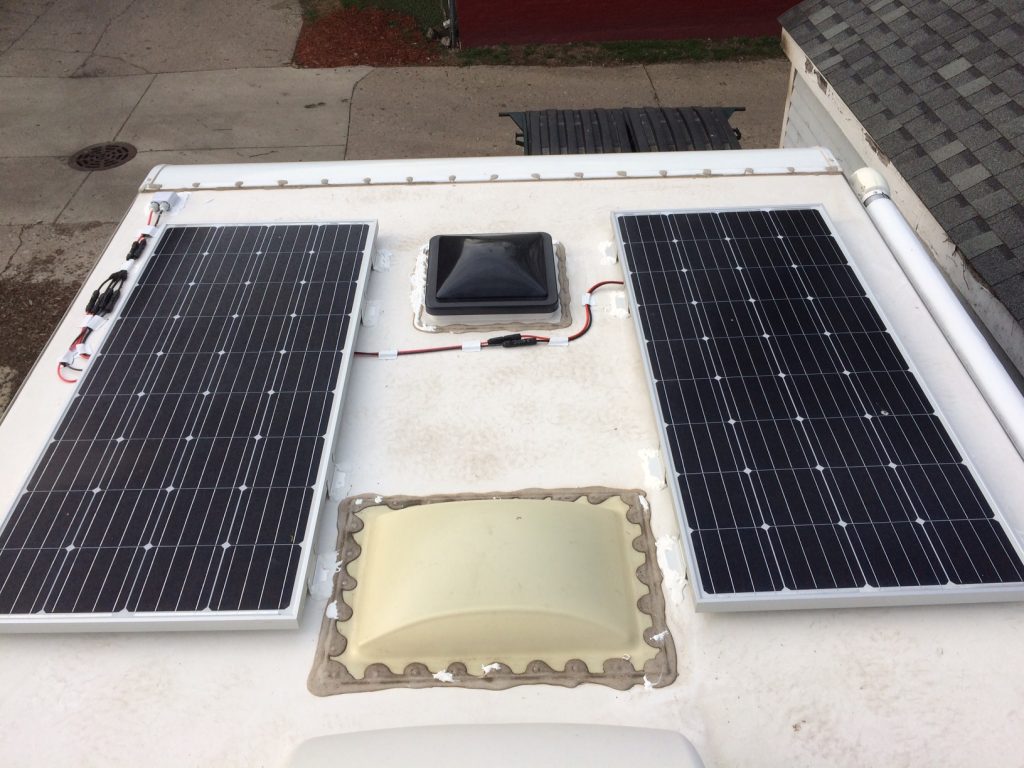
Two 26″x59″ 175W panels mounted to the roof

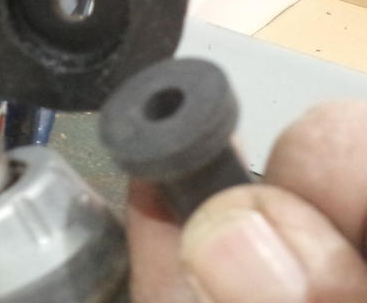
Lance suggested using rubber well nuts to mount the panel feet to the roof instead of basic lag bolts.

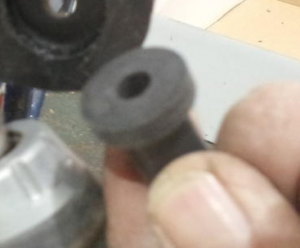
3/8″ 10-32 thread well nut

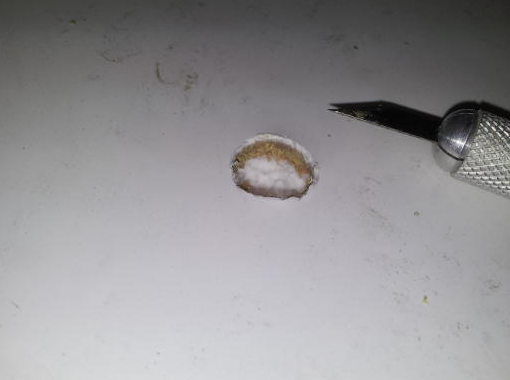
While cleaning out the holes for the well nuts was time consuming and hard on my fingers, in the end I think it makes sense – the rubber well nuts should seal the hole even without Dicor and the Luan roof is only 1/4″ thick so a lag bolt wouldn’t have sufficient holding strength.

Cleaning out the excess TPO roof material from the hole was a pain

Although I didn’t take photos of it, after inserting the well nuts I ran a thick bead of Dicor non-sag sealant around the holes before installing the feet.  Then once all the feet were properly attached to the roof I covered the bolt heads and feet edges with Dicor self-leveling lap sealant.  The only place that didn’t get a second application of Dicor was the inside edge of the feed underneath the panel.

Copious coating of Dicor underneath and on top of the mounting feet

While I would really like to apply some, the panels only stand about 1″ above the roof, which is barely enough for me to squeeze a finger behind them and nowhere near tall enough to manage a caulk gun.

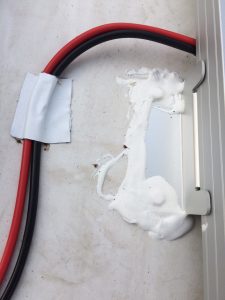
All the wiring was taped down with Eternabond.  If you’ve never used that stuff, it’s amazingly strong and truly can’t be pulled up once cured without significant effort.  I may cover the wiring completely in the future just to protect it from UV exposure.

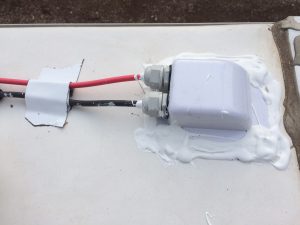
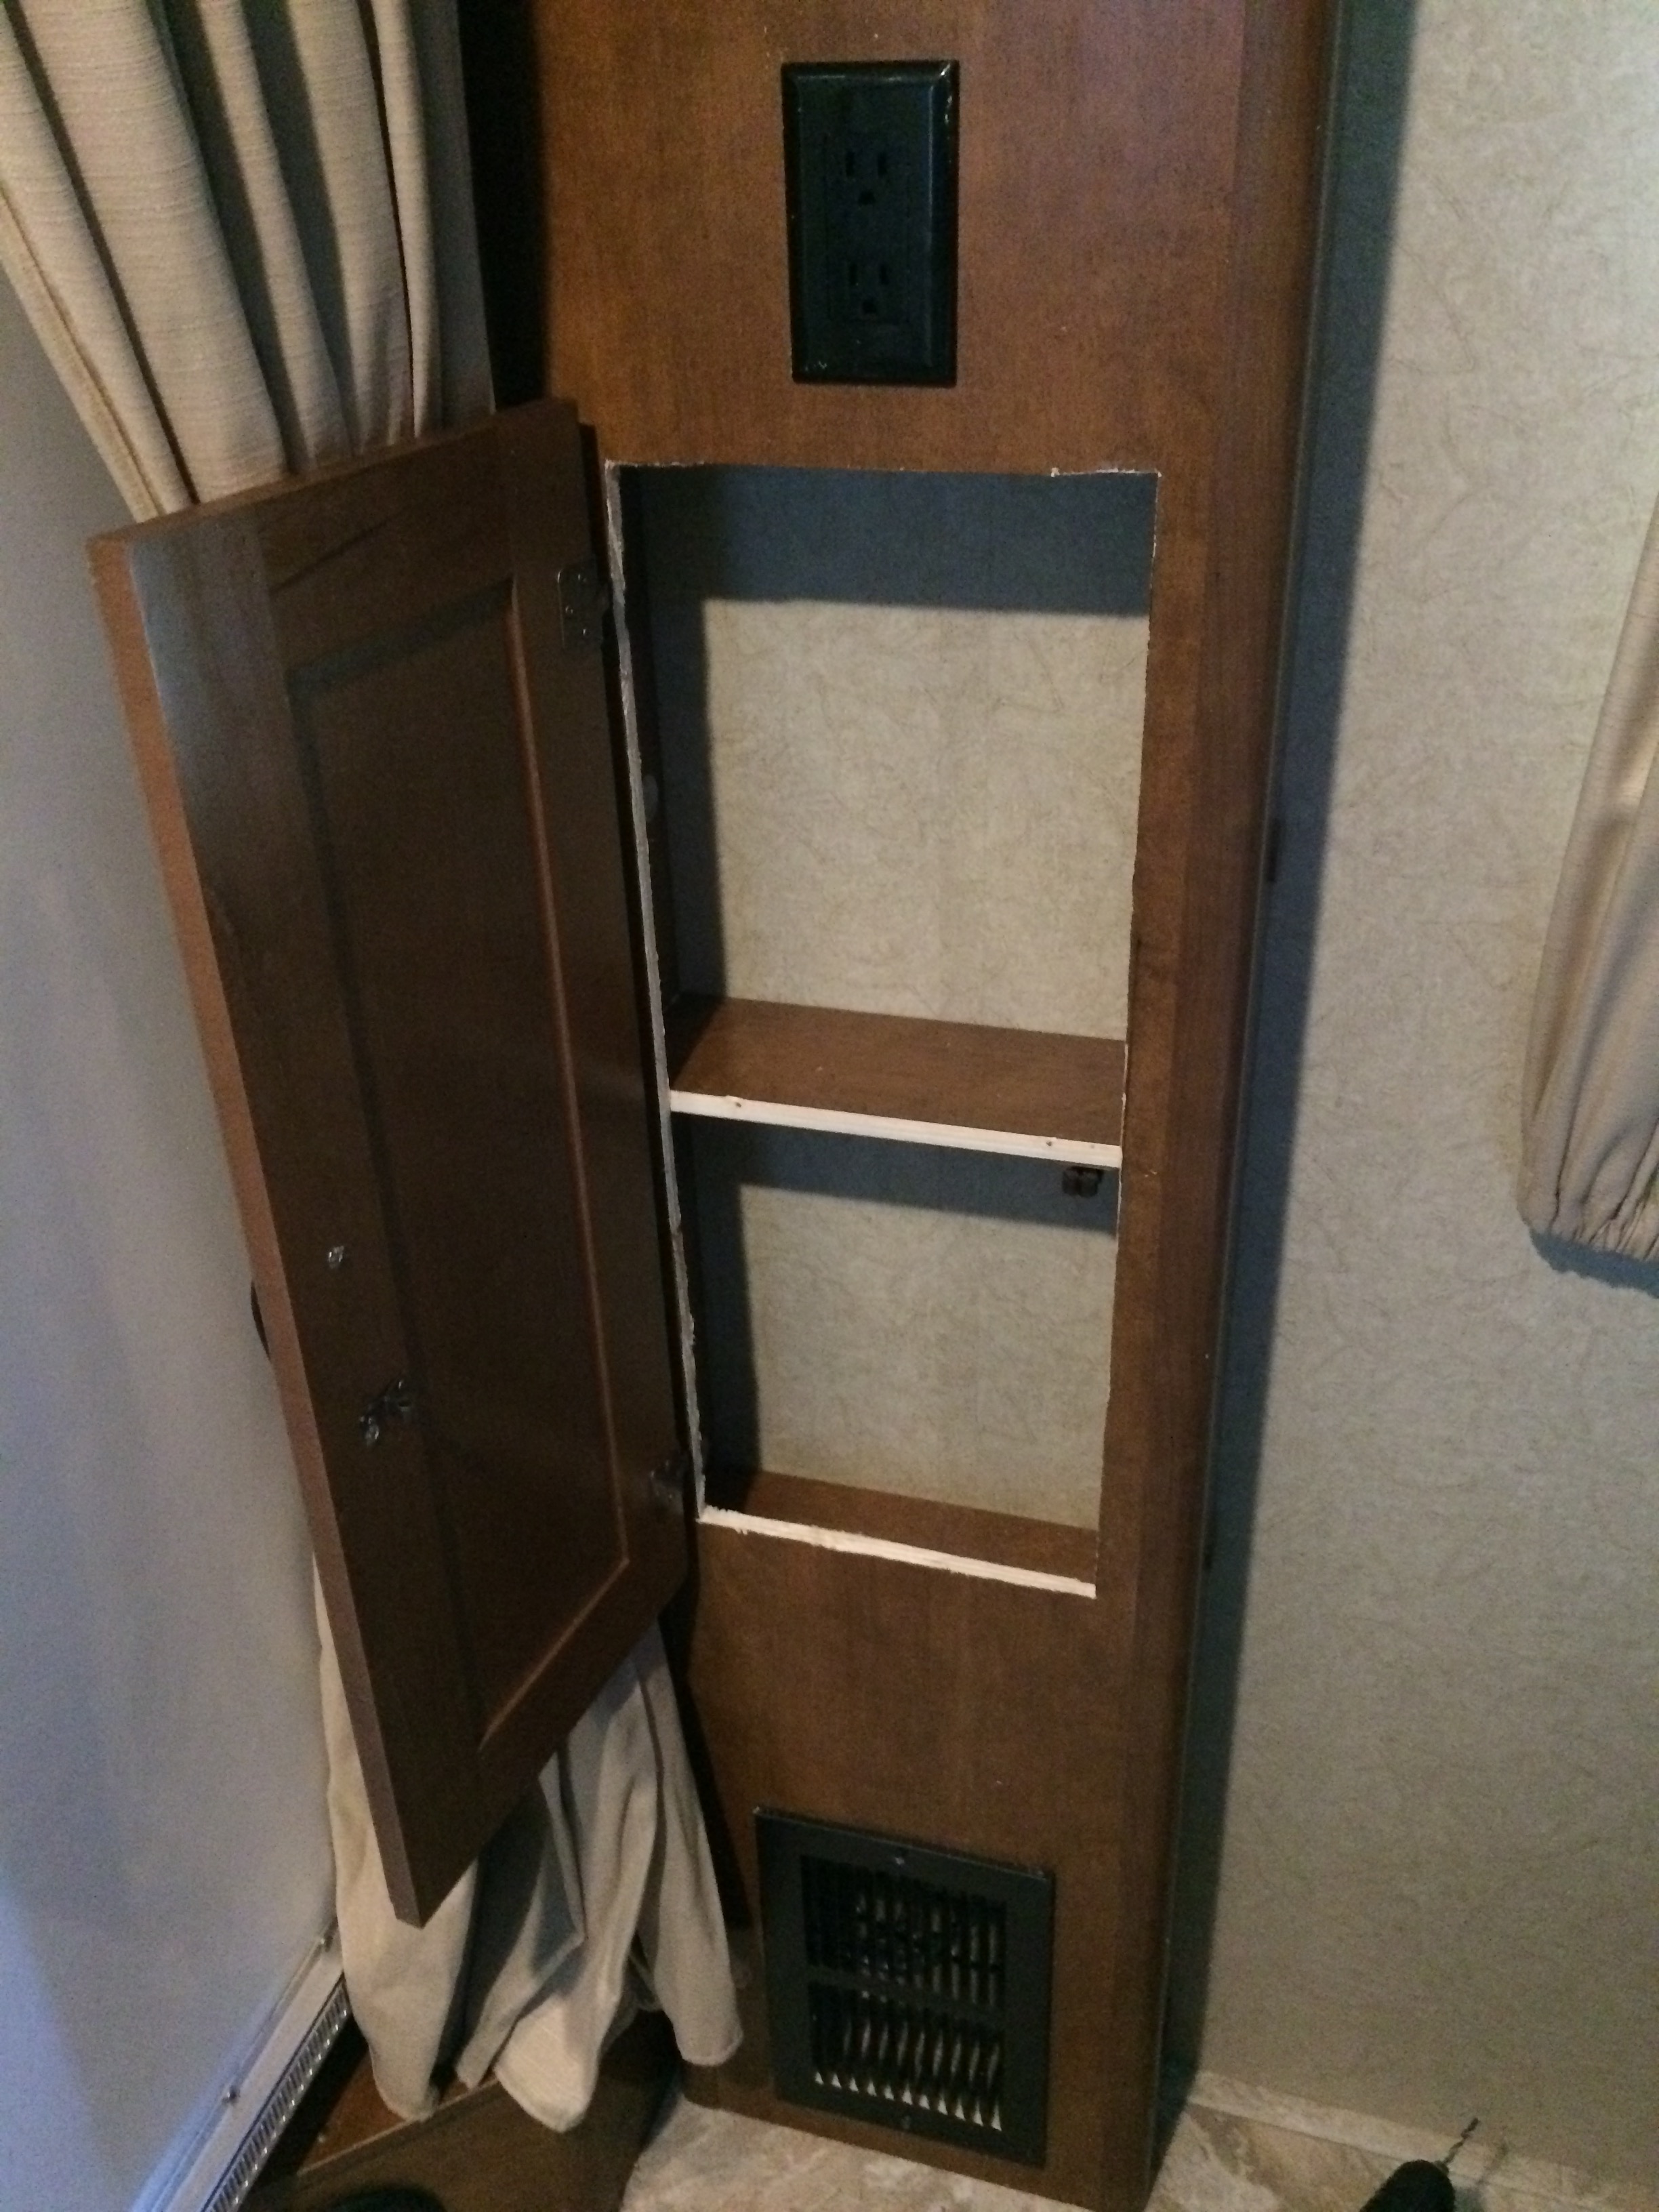
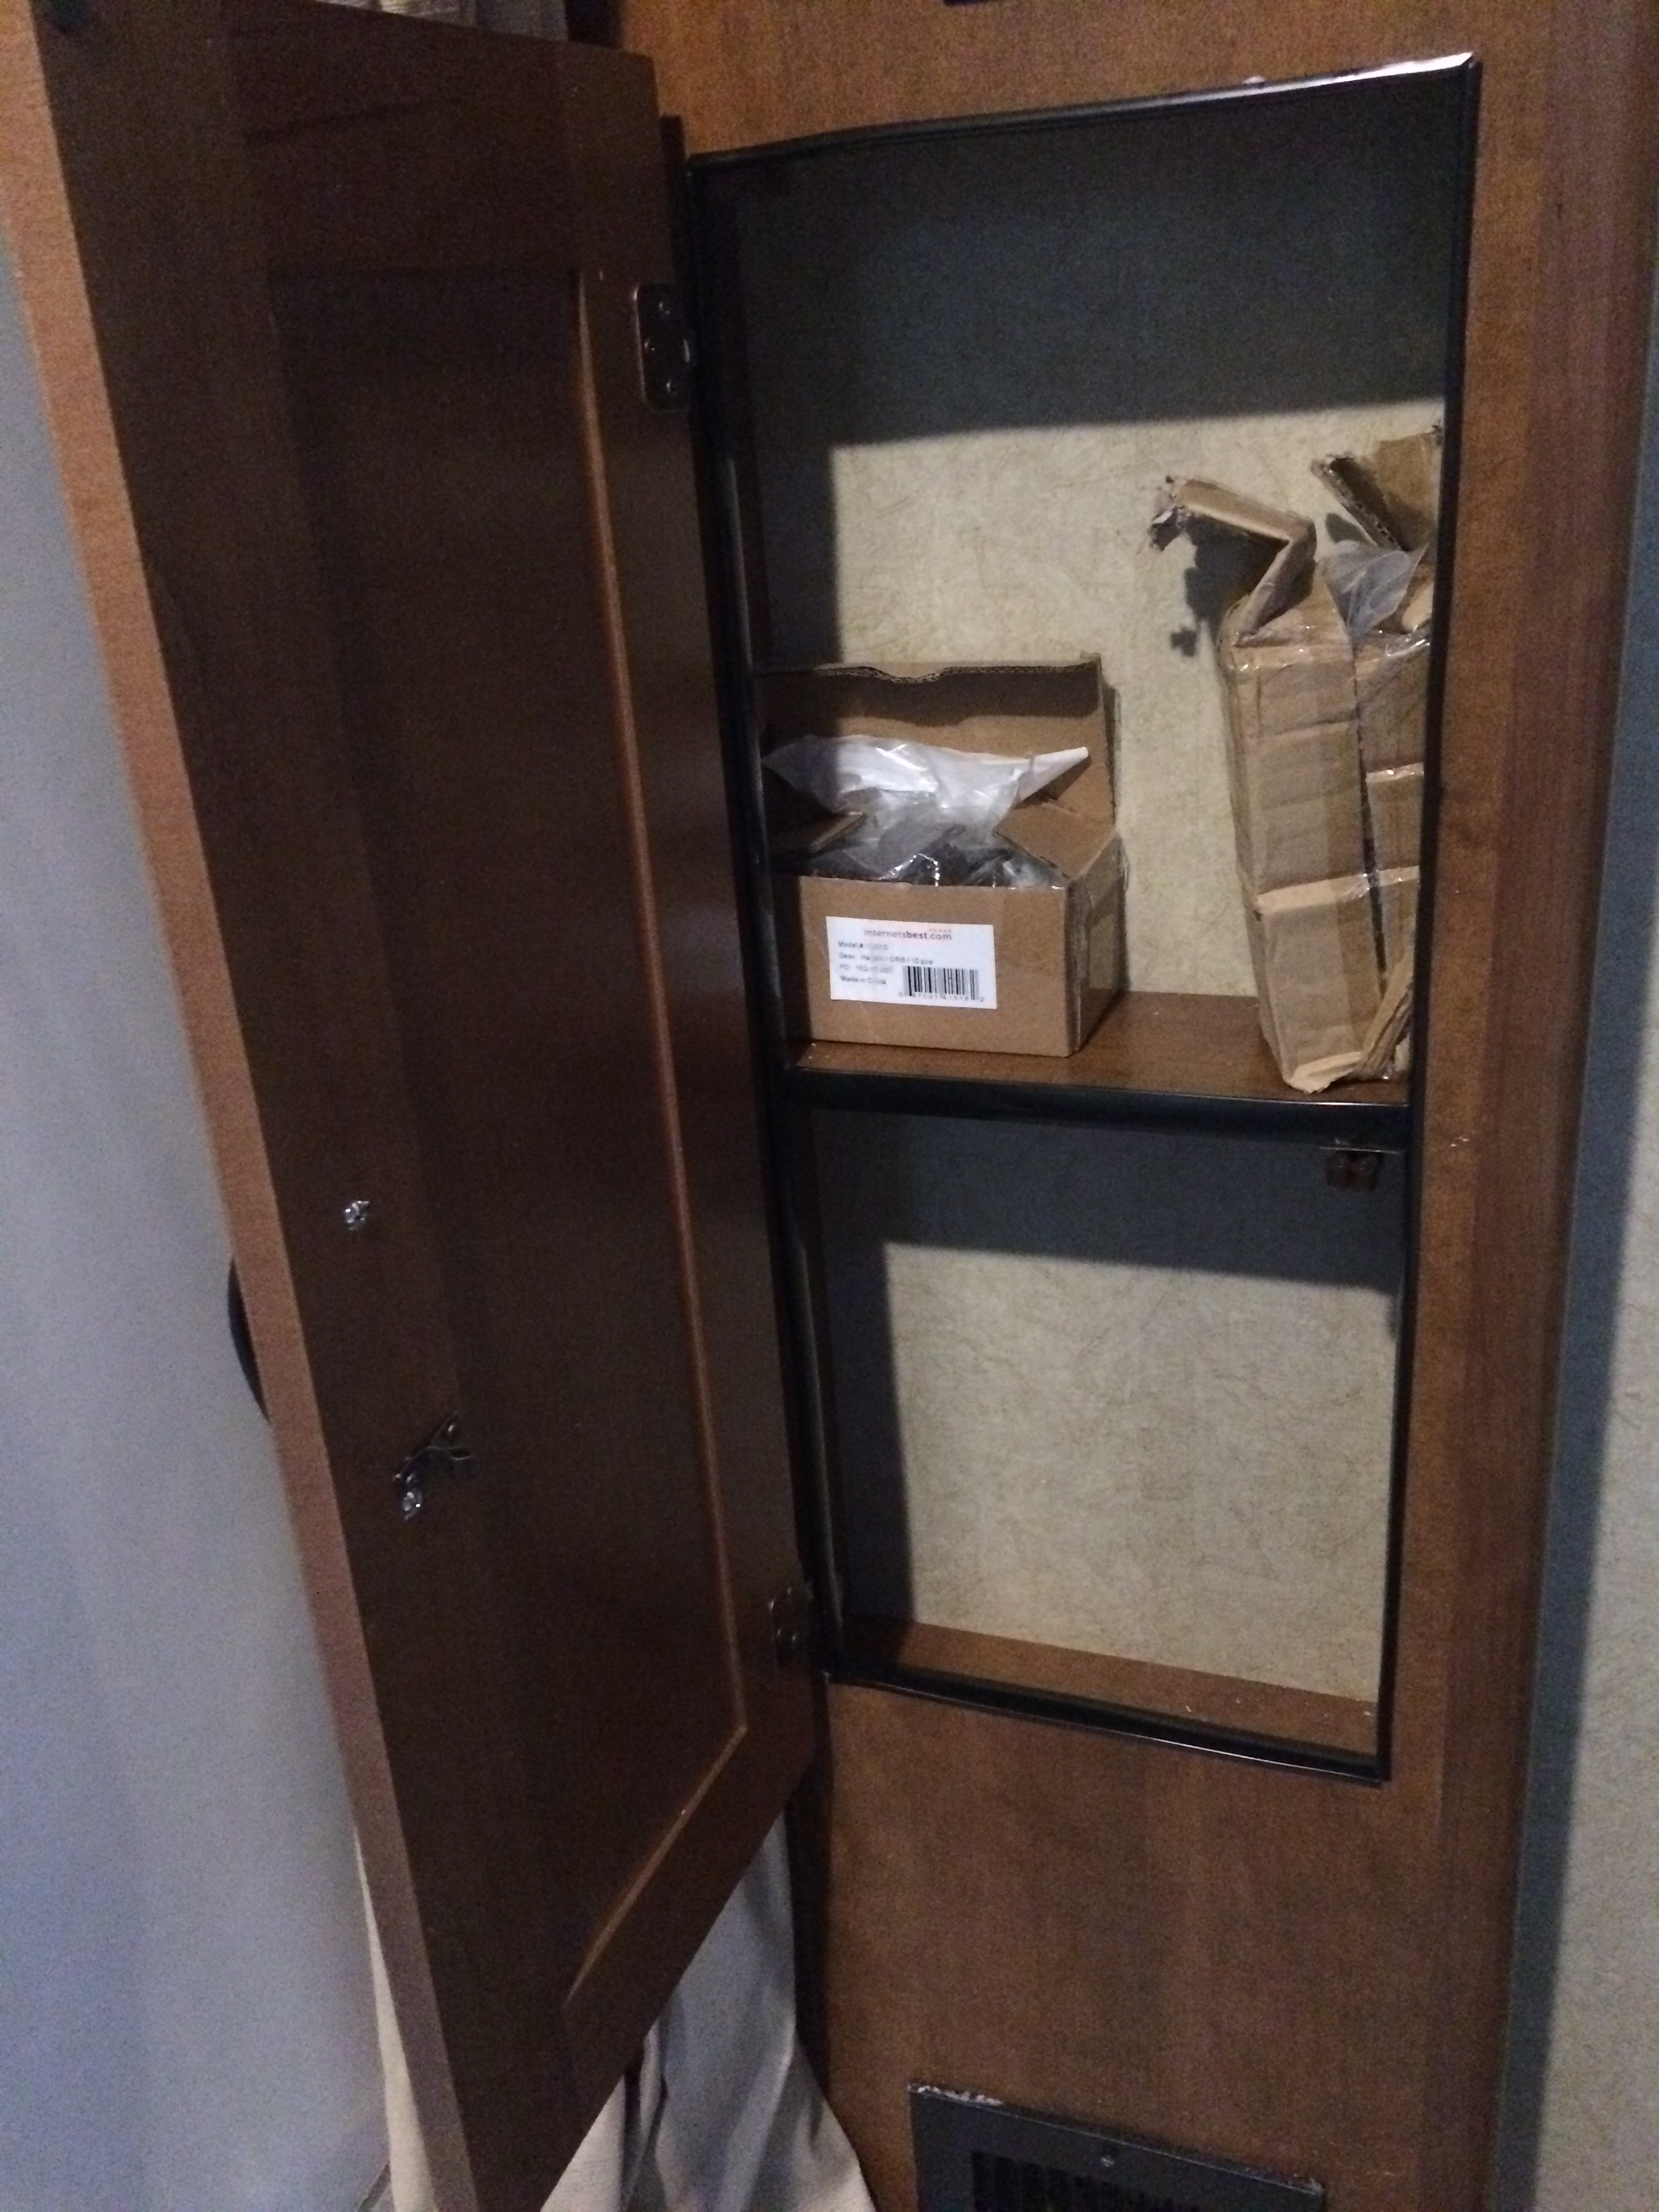
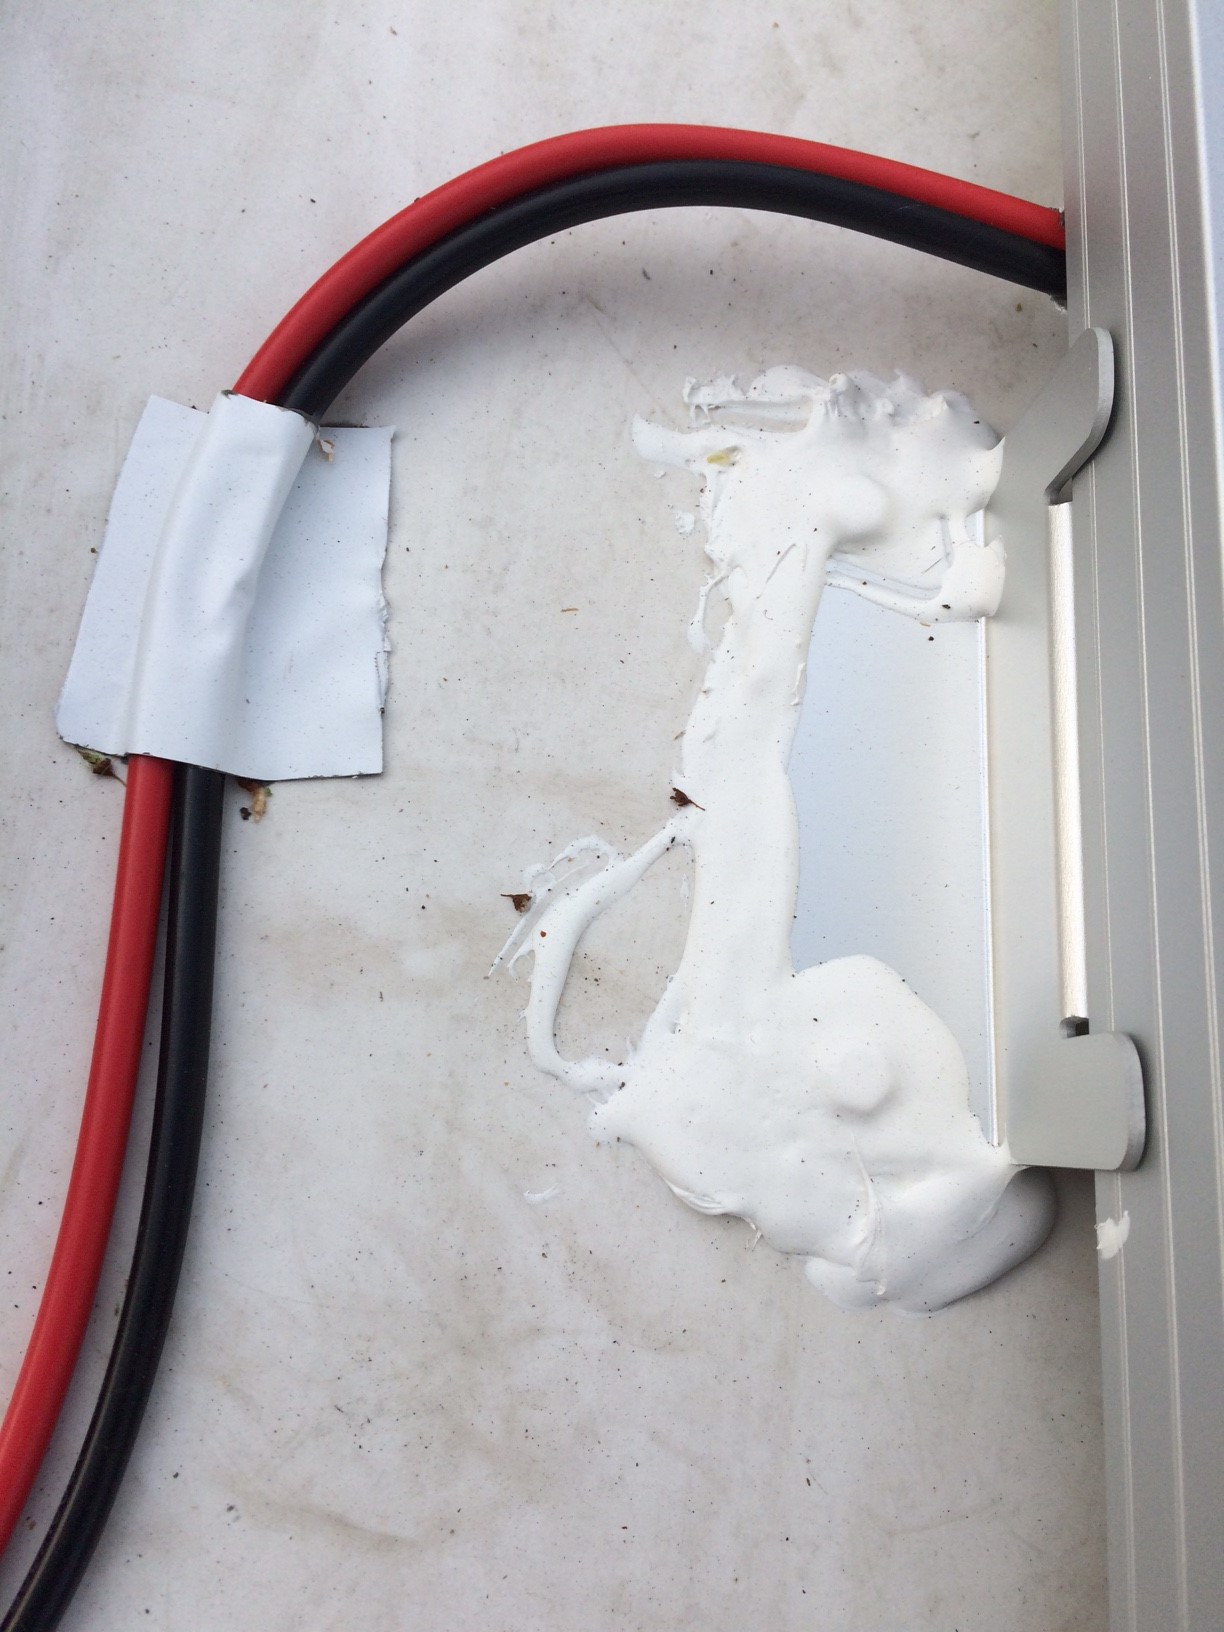
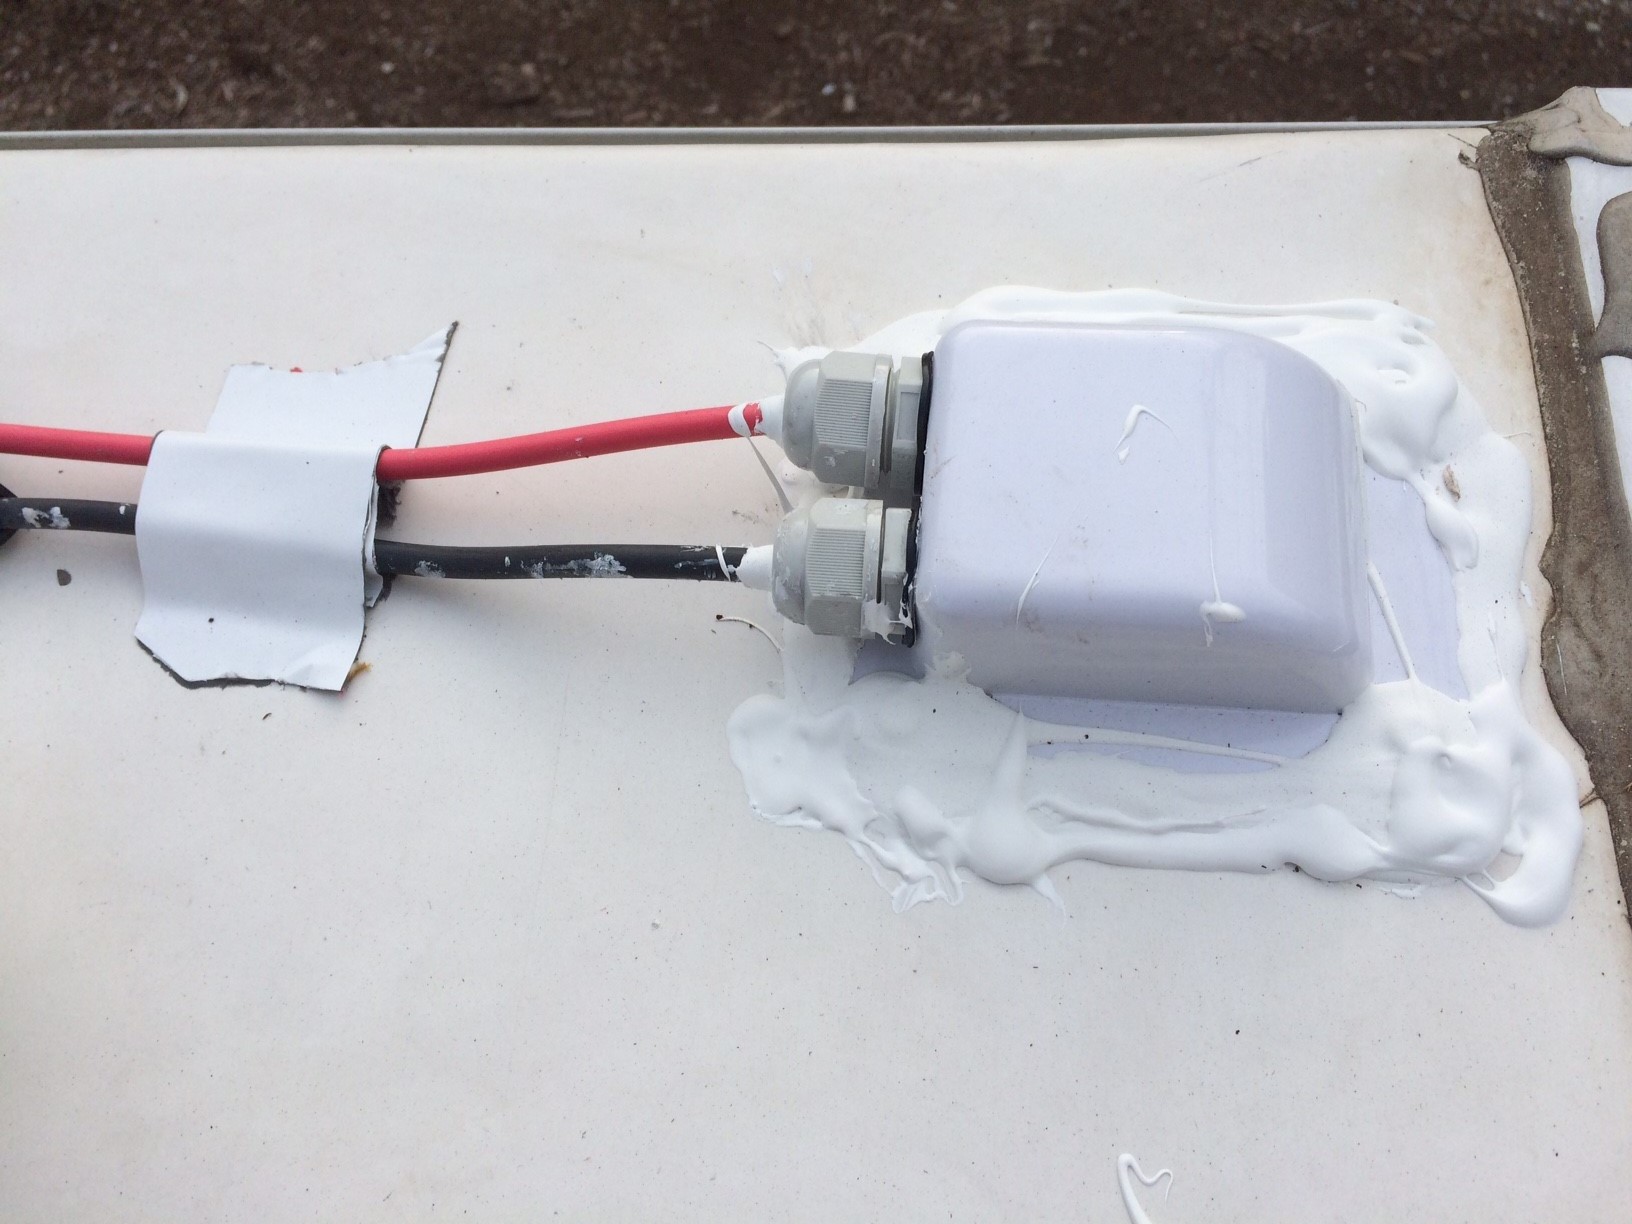
Cable routed through a cable gland into the wardrobe

To route the wiring from the roof into the trailer many people run their wiring down through their fridge vent.  While I considered this option, it presents two issues.  First is that getting to the wiring involves removing the fridge, which is heavy and really a non-trivial job.  Second and more important to me is that voltage decreases over distance, and using the fridge vent would add about 15′ of wire between the panels and the charge controller, rendering the panels less efficient and ultimately producing about 5W less power. (For those interested in the math, the 175W panels generate 9.18A @ 19.06V.  15′ of 8AWG wire reduces that to 18.89V.  Assuming maximum amperage doesn’t change 9.18A @ 18.89V is about 173W).  So instead of using the fridge vent, I opted to run the wiring straight down through an interior cabinet and into the pass-through.

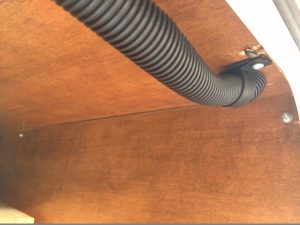
Wiring enters through the roof

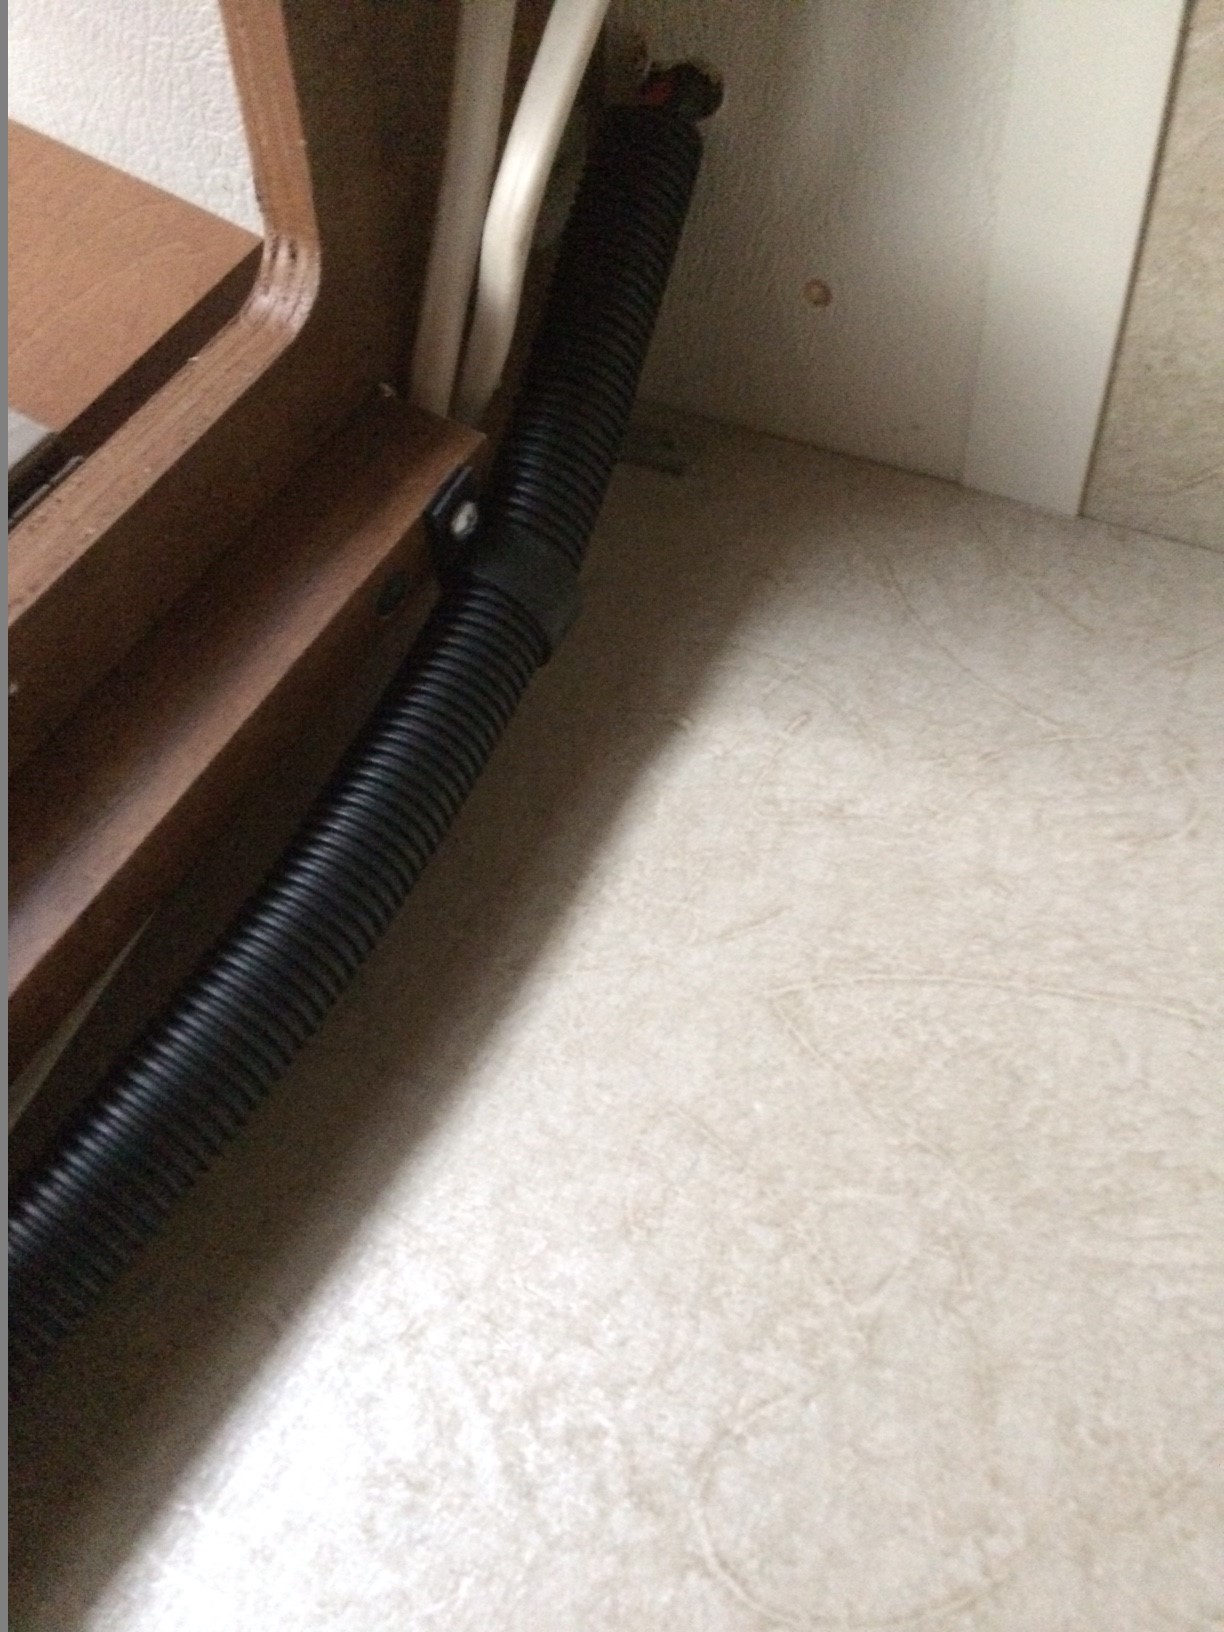
Wiring ran down the inside of the wardrobe inside wire loom

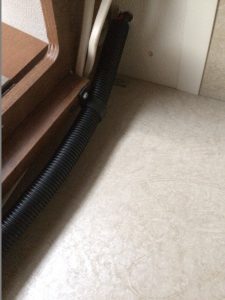
Wire into the pass-thru is wrapped


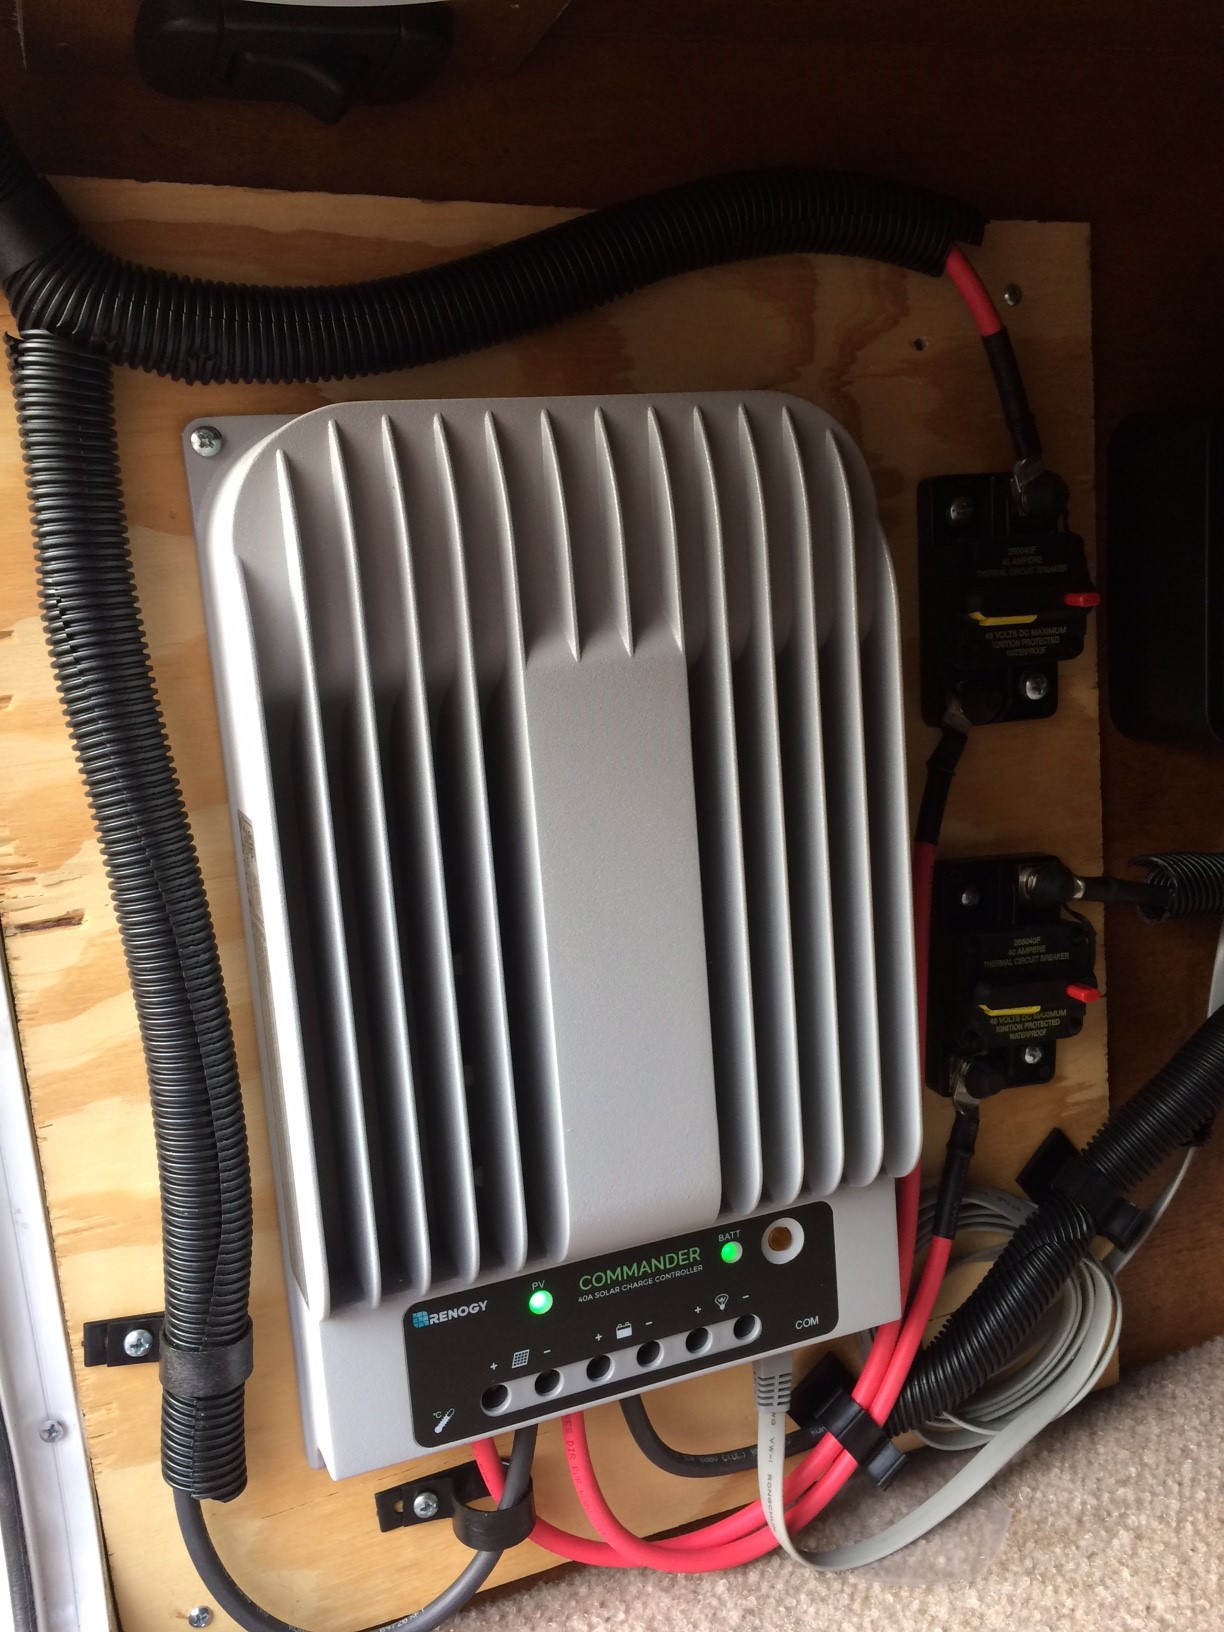
From here the connection goes to the charge controller, which steps down the voltage to avoid destroying the battery.  To protect the charge controller, the wiring from the panels goes through a 40A Blue Sea circuit breaker.  As an added bonus, since solar panels can generate significant current when the sun is out, if I need to do maintenance to the charge controller or battery I can simply trip the breaker to disconnect the panels from the electrical system.

Charge controller, wiring, and breakers all set up

For similar reasons I put a 40A breaker on the opposite side of the charge controller as well, inline between the controller and the battery.  In theory I could have used 50A breakers for this since breakers are normally spec’ed for 120-125% of peak load, but the charge controller is only rated at 40A and I didn’t want to risk damage in the event of an over-current short of the panel, plus the controller should never see more than 18.5A from these panels anyway.

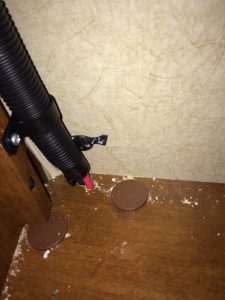
To get the wiring to the battery I drilled a hole in the trailer floor, wrapped the wire in wire loom, and ran it underneath the trailer along the frame directly to a 100Ah AGM battery.  Side note: I used marine-grade tinned copper lugs for all bolted/threaded battery connections (10-32 for the breakers, 5/16″ for the battery itself), a good crimper, and heat shrink to keep the connections stiff.  Annoyingly the Renogy controller didn’t come with a battery temperature monitor, so I ordered that separately on Amazon and will install it once it arrives.

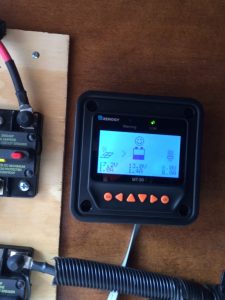
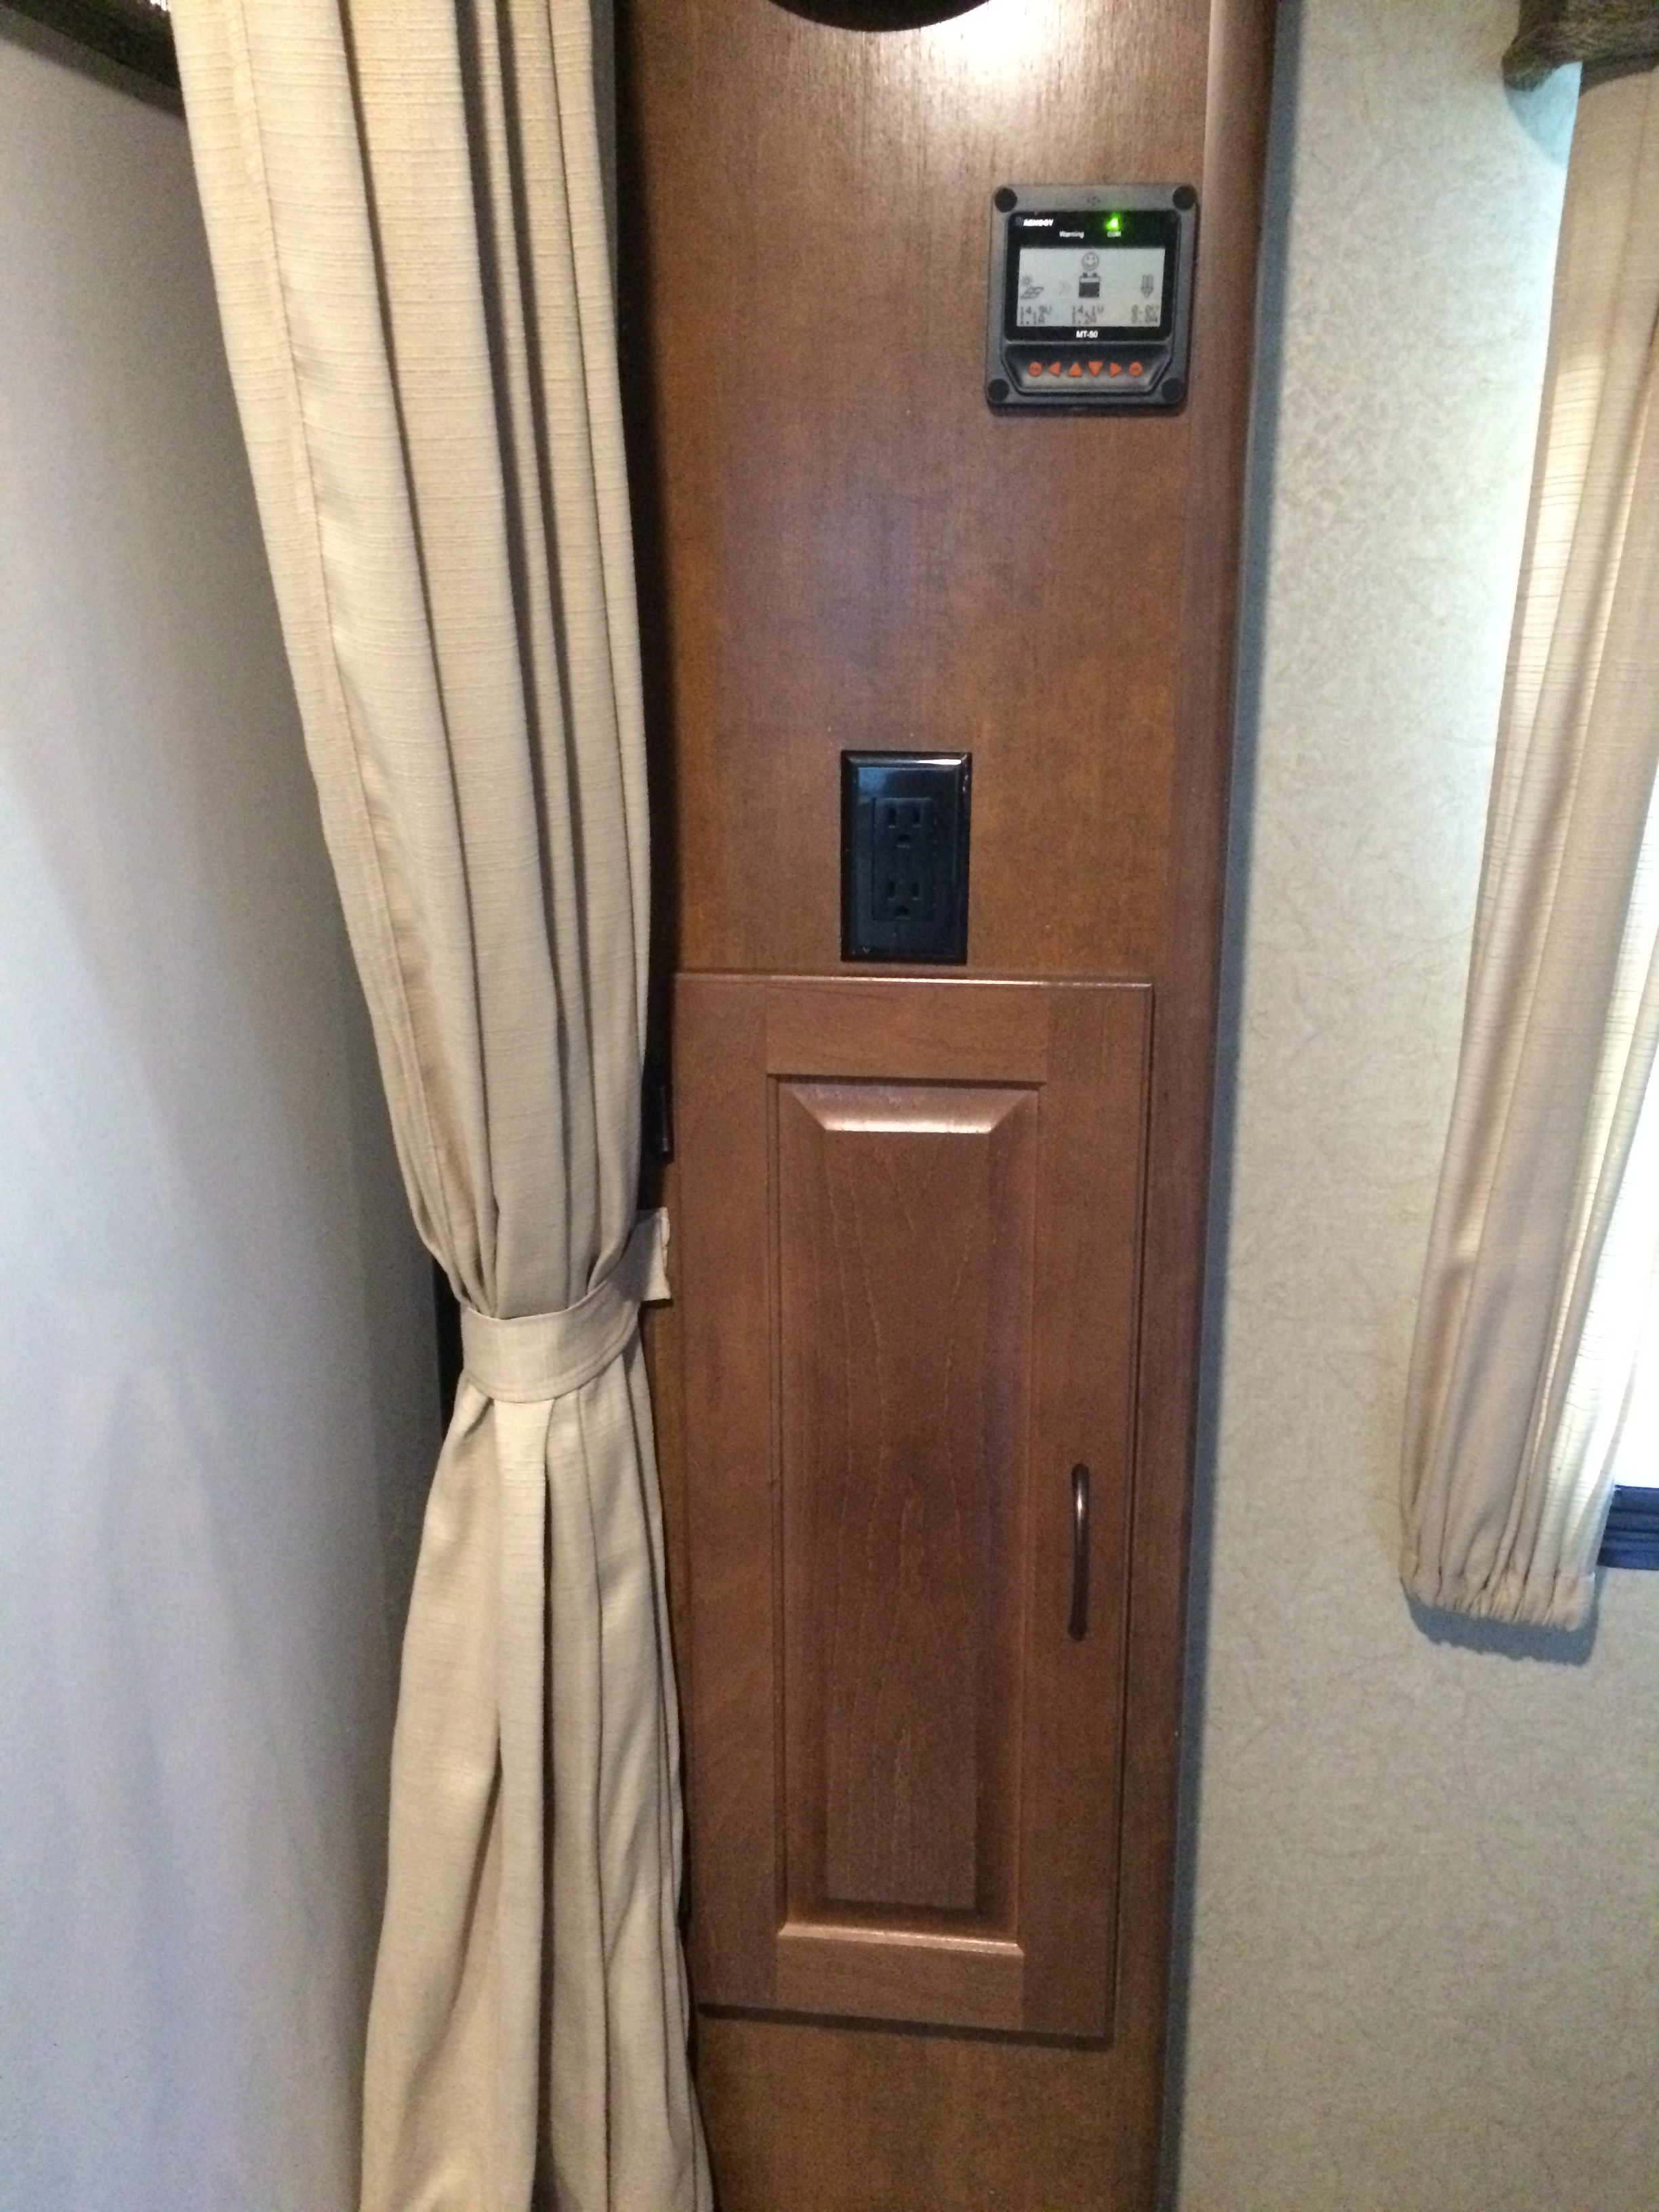
Remote monitor, temporarily connected

Finally I hooked up the remote monitor and flipped the breakers on.  The only configuration I had to do for my setup was to change the battery size to 100A.  I was hoping to run the monitor to the interior but it only came with 6′ of RS-483 cable.  I’ve ordered 15′ of straight through Cat-5, which should be sufficient for a short run (RS-483 is similar to Cat-5 but all pins are paired (i.e. 1/2, 3/4, 5/6, 7/8 rather than Cat5’s 1/2, 3/6, 4/5, 7/8) and the cable is shielded) and will move the monitor in the future.  As you can see, the panels were generating 1A @ 17.2V while the sun was low in the sky and a bit overcast at about 7pm.

Hindsight

I’ll provide updates about the effectiveness of this setup once I’ve run it for a bit, but so far I’m pretty happy with the result.  About the only thing I would do differently in the future is to use L brackets to mount the solar panels instead of the solar panel-specific Z brackets I purchased.  The aluminum Z-brackets work fine, but because they mount the panel so low to the roof if I ever need to remove the panels I will need to remove the feet from the roof.  Simple L brackets mounted into the side of the panel frame rather than the bottom would be easier to remove in the future.  For those interested in replicating this setup, I’ve published my PartsList along with costs and links.

The Future

Of course owning a trailer is like owning a boat – there’s always more work to be done.

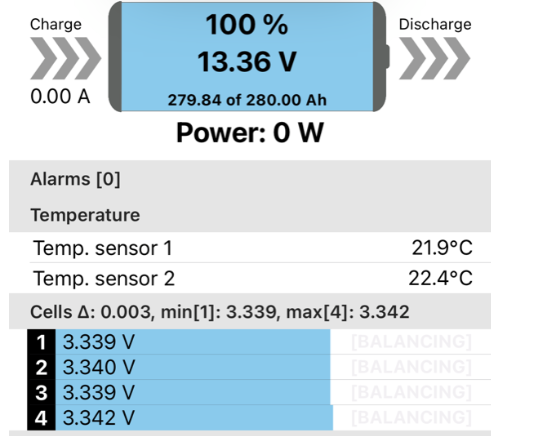
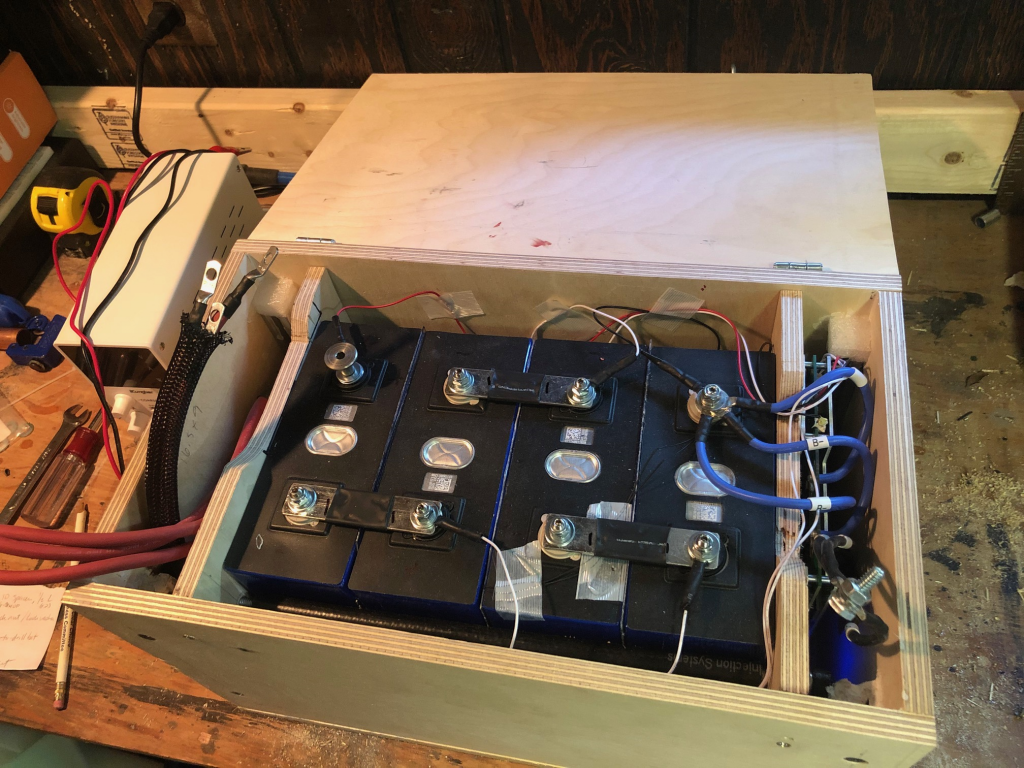
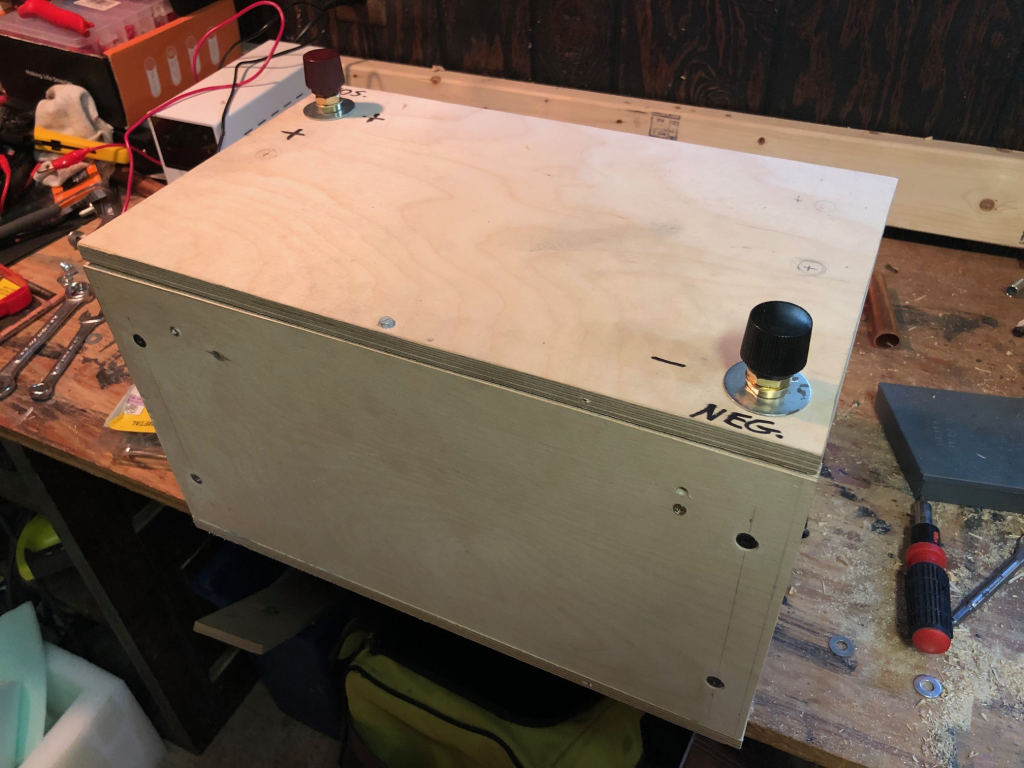
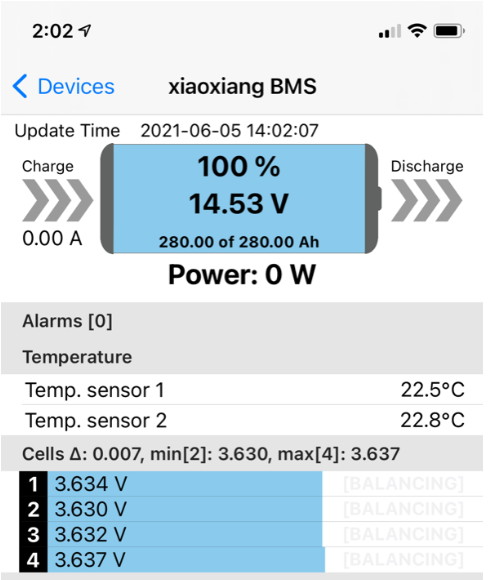
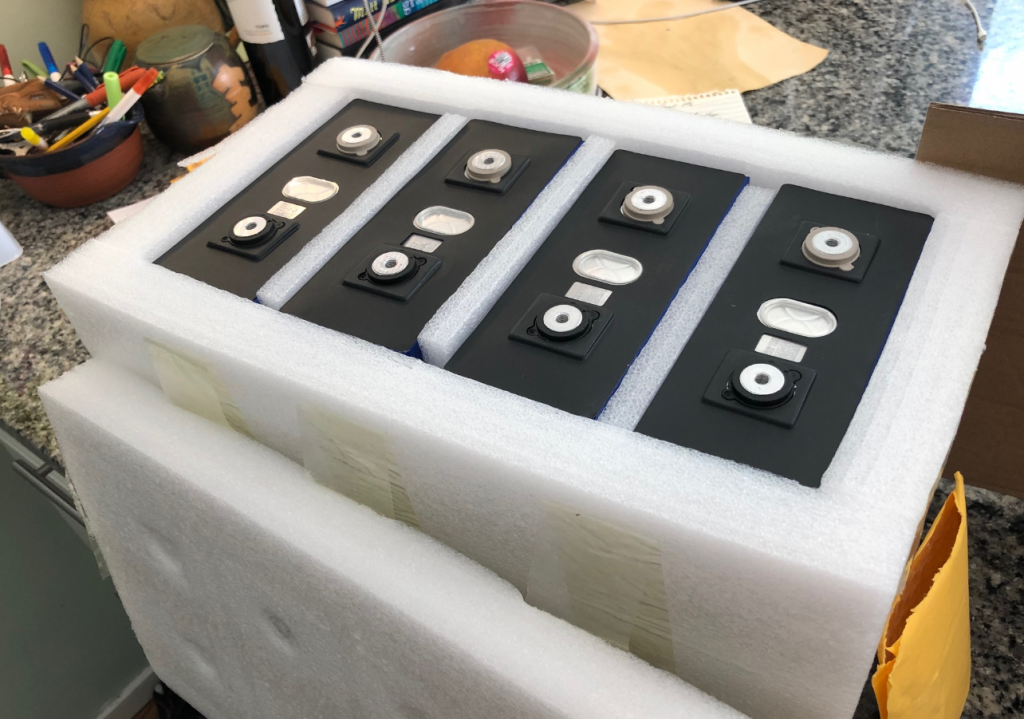
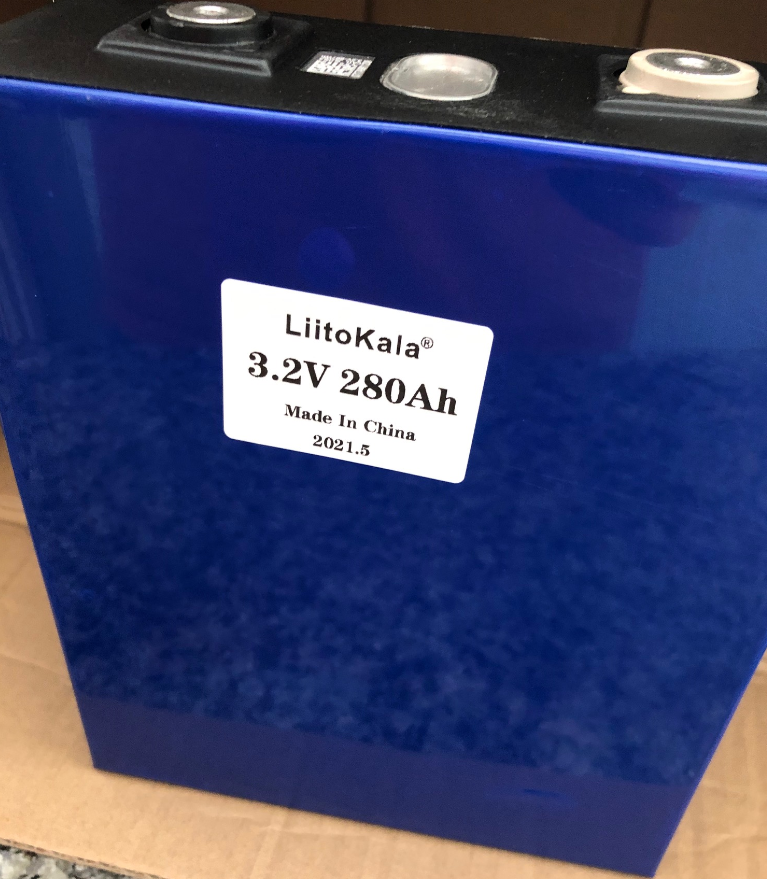
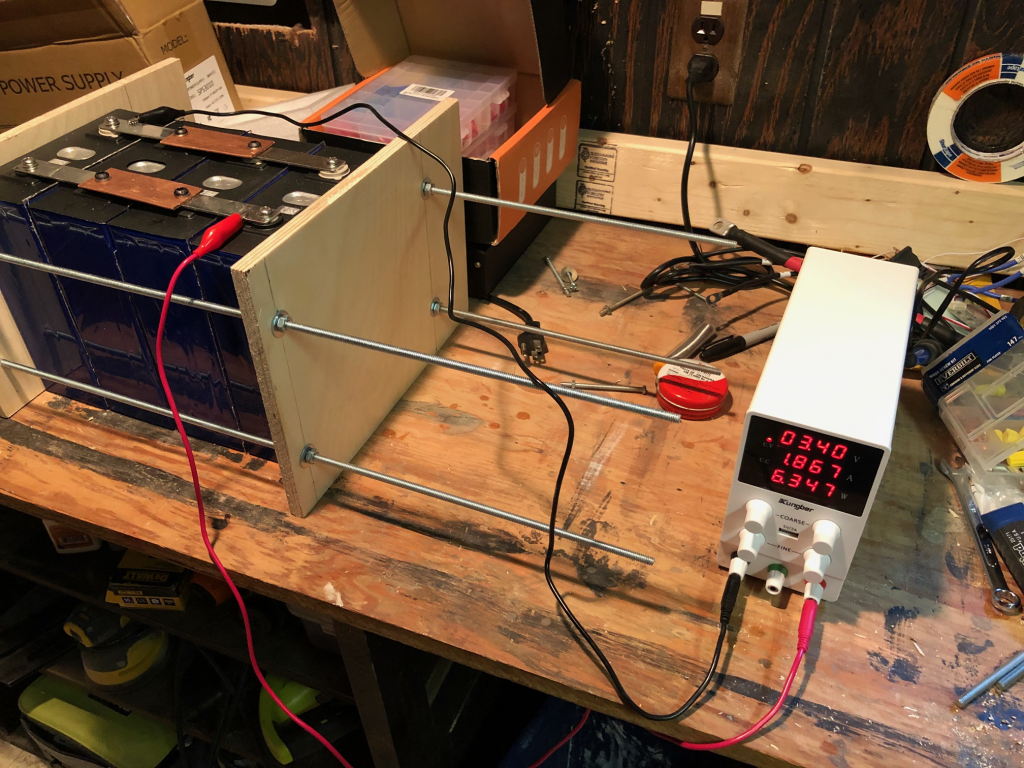
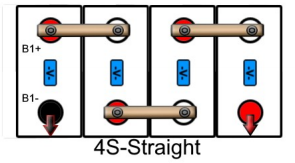
Currently lithium batteries are too expensive to use, but as the price for LiFePO4 batteries comes down I will eventually switch.  My 100Ah AGM battery cost $180, weighs 66 lbs, and can only be discharged to about 60% before it starts to damage the plate.  Two AGM batteries would give me 120Ah usable capacity and would cost $360 but weight 132 lbs.  A single 130Ah lithium battery would provide 117Ah and weight less than 30 lbs, but currently costs about $1,000.

The remote monitor for the charge controller tells me how much power is being delivered to the battery bank, but not how much I consume.  Eventually I will wire in a shunt and a full battery monitor.  I really like the SIMARINE Pico Blue but given the cost will probably start with a $30-40 basic LCD model.

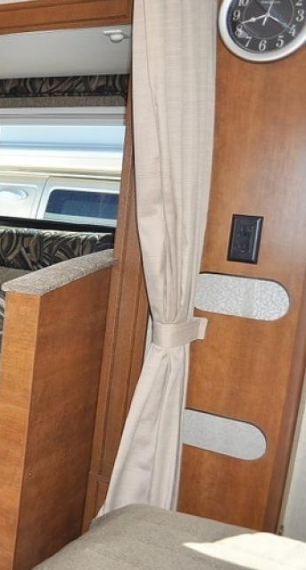
The majority of the trailer runs off 12V power (lights, water pump, stereo, TV, fridge, and heater), but no way to readily power 120V appliances.  We really don’t use the microwave and I can live without an air conditioner, but it would be nice to make a pot of coffee in 5 minutes with the Mr Coffee instead of 40 minutes with a percolator, and I know Christi would like to be able to dry her hair once in a while when we’re on a long trip or recharge her laptop if she wants to spend some time writing.  I’m considering a 2000W pure sine wave inverter as part of next year’s upgrade.

If I ever need more power, there’s still enough space on the roof to add a pair of 50W-100W panels in series to the existing setup.  Shadows from the A/C might render it less effective in the morning and evening though.

New(er) camper, 2015 Lance 2185

This spring we decided to sell our 2005 Forest River Surveyor 235RS camper and upgrade to a 2015 Lance 2185.  The Surveyor served us well since purchasing it in 2012, but the boys are growing up and sharing a bed had meant more and more scuffling over space, blankets, and one of them kicking the other.  On top of that the floor space was tight, and with the Land Cruiser we now have plenty of towing capacity.

Our old Surveyor 235RS trailer.

After looking around I discovered that I could count the trailer models with triple bunk options manufactured this decade on two hands.  I seriously considered the Dutchman Aerolite 2423BH/242BHSL, which had a really cool storage and lift system for the bunks.  However the carrying capacity was quite low – so low that we wouldn’t be able to carry water, bikes, and all our remaining gear together – and Dutchman confirmed the rating was limited by the axles and not just the tires.  Also it was a full 4′ longer than our current trailer, which meant I might have to give up our nearby alley parking space.

After far too much analysis on size, capacity, quality, and price, we ended up deciding on the Lance 2185.  In terms of the layout it had everything we wanted – triple bunks, a slide out dinette, a walk around queen bed, and a (convertible) sofa.  At about 4500# empty and 6000# gross weight it was a fairly light weight trailer, and best of all it was only 16″ longer than the Surveyor.  I searched RVT.com and RVTrader.com, spoke to the local Lance dealer, and then started looking nationally for a good price with the intention of picking it up or shipping it back to us.  In the end we ended up purchasing a 2015 Lance 2185 from Camping World in Wauconda, IL, as it was almost half the cost of a similarly equipped and delivered 2018.

…with slide out

Our new trailer