In my earlier post, I talked about what LiFePO4 batteries were and why I went with them. In this article I’ll cover how I built mine, which should allow most savvy DIYers to more or less repeat the process, building on what I learned. Most of what I learned about LiFePO4 batteries was from the DIY Solar Forum – if you’re truly interested in building your own battery I suggest reading the discussion forum there as well.
One note before I get started – this information is a general overview of what I did, how, and why. However, every battery is different (even LiFePO4, where different manufacturers may use different chemistries to construct their batteries) and every tool is unique. Furthermore, what worked for me might not work for you, and it’s entirely possible I omitted some critical details either accidentally or intentionally (for clarity). If you have no understanding of batteries or electronics and try to follow this step by step and end up blowing up your battery or burning down your house, that is not my fault. Build (and enjoy) at your own risk – part of the fun is learning as you go along.
The largest cost for this project are the battery cells. Right now, decent quality 280Ah cells cost about $100 each from Alibaba or AliExpress, but you’ll need 4, and shipping from China is slow and expensive. Buying cells from China is also a bit risky – some suppliers will buy and re-brand cells, some will sell used cells, and some cells are lower quality (Grade “B” or “C”) or are “unmatched” (very different internal resistance or capacity). Shipping times vary greatly, and not all sellers will do a good job packing your cells so they may arrive damaged. AliExpress (and Alibaba, I think) offer delivery and other buyer guarantees, but in most cases you’ll need to ship the cells back to the seller at your cost to get a refund. Using a credit card with a good buyer protection policy is really important.
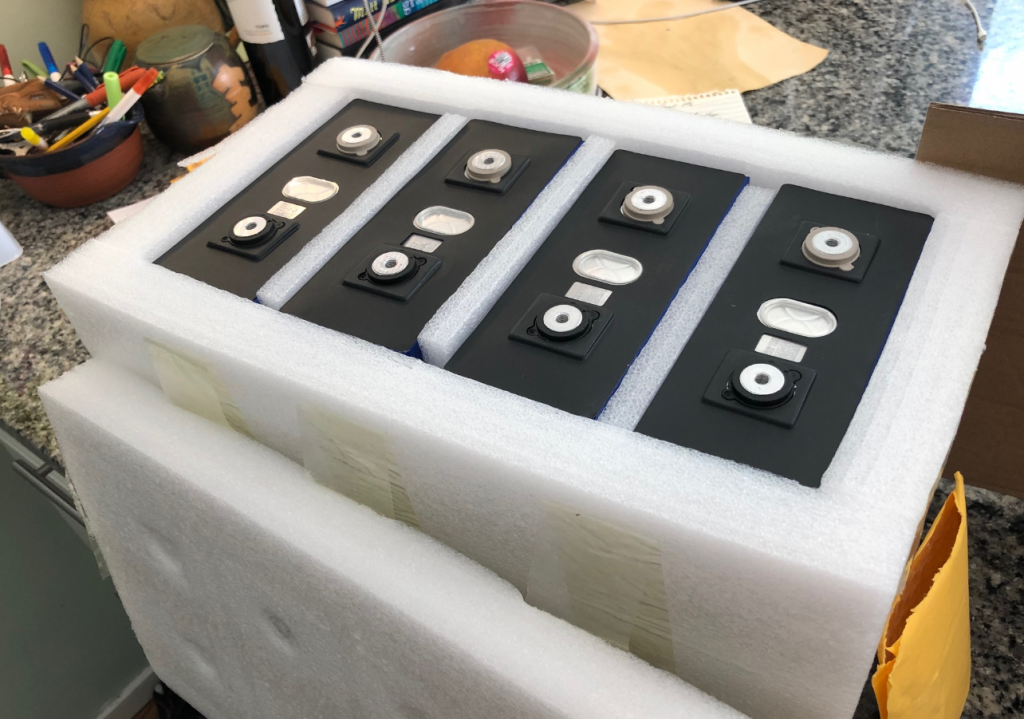
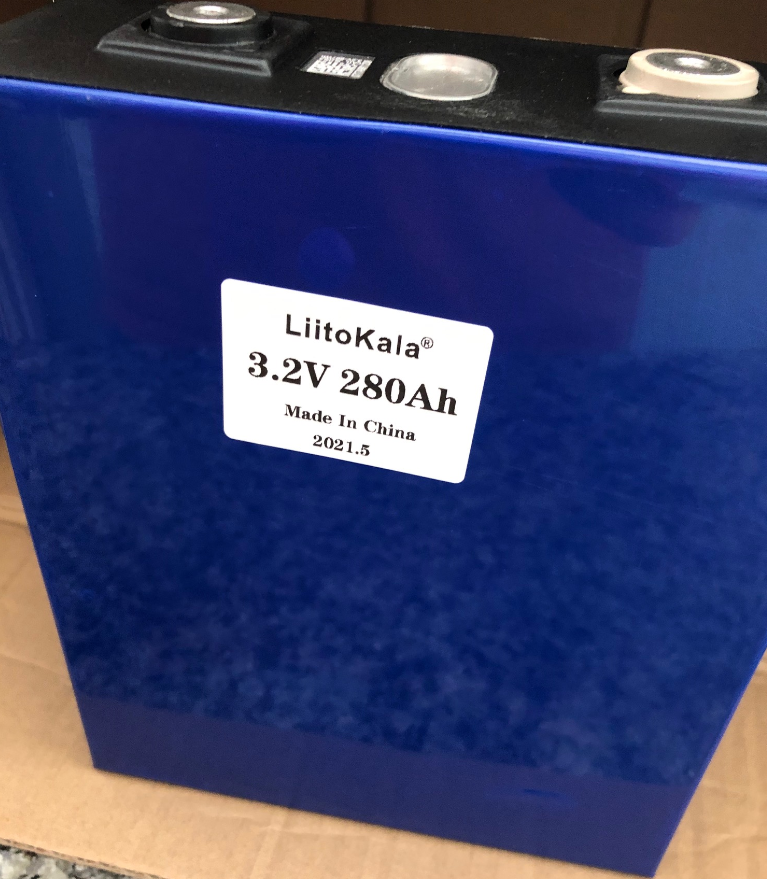
All said I did a little research, but I also got a little lucky with my purchase from the LiitoKala store on AliExpress.
The next major cost is your battery management system (BMS). While it’s technically possible to build a battery without a BMS, it’s generally a terrible idea and you should not do it. A quality BMS will provide a number of critical protections which will prevent you from destroying your very expensive battery cells quickly, including:
- Low voltage cutoff (<2.5V) to prevent you from draining your battery below 1%.
- High voltage cutoff (>3.65V) to prevent you from overcharging your cells
- Temperature cutoff to prevent you from destroying your battery by trying to charge it below 0C or discharge it below ~20C, or conversely from trying to charge or discharge above 55C)
- Automatic cell balancing, to ensure that all 4 cells keep the same voltage. This will slowly “steal” power from hotter (higher voltage) cells and trickle it to lower voltage cells, which maximizes your cell capacity and performance.
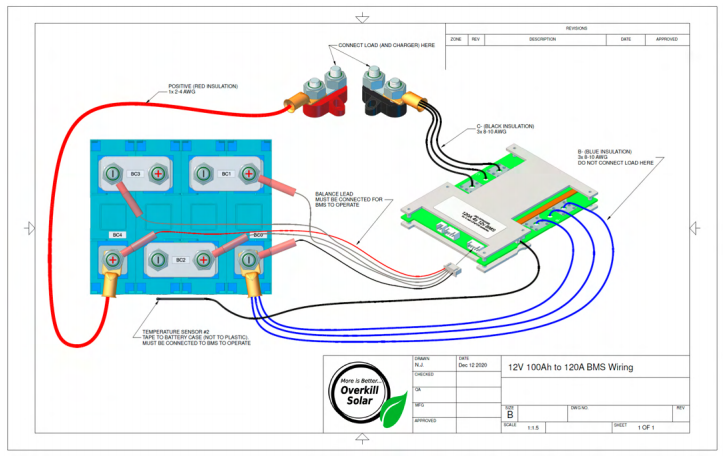
Since my BMS is rated for 120A, I built my battery to handle a continuous load of 120A. While I don’t have a 120V inverter right now, this allows me to add one up to 1500W to my camper at a later date without changing the battery. To handle 120A continuous load, I used three 8 gauge wires or heavy duty busbars for all connections. Note that 10AWG wires can carry up to 40A so three of them should handle 120A, but I believe in engineering a margin of safety into my design so stepping to 8AWG, which can handle 55A, ensures my battery wires will not overheat.
Parts
- (4) LiFePO4 280Ah cells @ 3.2V (Currently $450 from the LiitoKala store on AliExpress).
- Overkill Solar 4S 120A BMS. (Overkill buys Xiaoxiang BMS, tests, configures, and re-brands them. I purchased the Xiaoxiang BMS from an eBay seller in the US for $105. You can get them cheaper off AliExpress, but I recommend paying a few extra dollars and buying one from Overkill Solar which has been tested and has a warranty).
- 150A fuse ($9) as your last line of defense in the event of a short
- Heat shrink (various sizes) to help protect and strengthen your crimps (about $5)
- Good quality 8AWG wire. I had some available but if you don’t then just buy a spool. Make sure you get real copper, not copper-clad aluminum (CCA) which has a much higher resistance
- 8 AWG lugs and 10 AWG lugs for battery terminal crimping. The battery terminals are M6 (6mm) and so 1/4″ battery lugs (6.3mm) will work. I needed six 10AWG lugs just for the BMS as mine came with 10AWG pre-soldered. If you bought the Overkill BMS with M6 terminals you’ll need double the number of lugs, and in that case I recommend using all 8AWG wiring. I use 8AWG for all other internal wiring, which means I needed 12 for the positive wiring as well – three 1/4″ for the positive M6 battery terminal, six 5/16″ for the fuse, and three 3/8″ for the exterior battery stud. Expect to spend about $20 on an assortment of sizes
- If you go with the Overkill Solar BMS you’ll need 5 ring terminals to wire the leads. I used the red 18-22AWG ones with 1/4″ rings and I soldered the ends to make them thicker since I think the wires are even smaller ~26AWG.
- Fiberglass strapping tape,($7) which is not strictly required but helpful to secure various things together (like attaching all 4 batteries)
- External battery studs ($20) to make connecting your RV wiring easy.
- I ordered a battery box ($15) from noco.com but then learned that you really should put your batteries in a compression frame, so ultimately I built mine out of some 1/4″ and 1/2″ birch plywood. I may still use the lid…
- Some M6 “grub screws” (aka set screws) for $10, which you can permanently fix in the battery with some Loctite ($5). Throw the screws your battery comes with away – you can’t torque them properly anyway.
- M6 washers, lock washers, and lock nuts. Home Depot or Ace Hardware have bags of these available. Don’t rely on a nut alone – always use a lock nut and/or lock washer.
- If you’re building a compression frame, you’ll need some 1/2 plywood and four pieces of 1/4″-20 threaded rod about 18″ long, with 8x washers and lock nuts.
Tools
The following were things required that I didn’t own. If you have this stuff already, then great. If you don’t have screwdrivers, wrenches, a heat gun, and other miscellaneous tools then you’ll probably need to order those too.
- You’ll need a Variable/Adjustable DC bench power supply in order to top-balance your cells. I bought the 30V/10A version and I’m really glad I did as even this one can take a couple days to fully charge your battery. Technically your BMS will probably be able to top-balance for you but at 30mV or less it could take weeks or months to complete if your cells do not arrive matched, and if they’re really far off it’s possible it might never complete.. If you want to be able to easily balance your battery and to be able to fully charge, then fully discharge, then properly re-charge your cells to confirm their capacity, just spend the $60.
- A constant current load tester. I used one that runs $15 but you could do this with a 12V lightbulb or a bunch of resistors if you can measure the amperage accurately with a shunt.
- A reliable multimeter.
- I recommend a torque wrench designed to measure in/lbs, since if you overtighten your battery terminals you’ll strip them and end up very unhappy. They’re under $20 and often referred to as a “bicycle torque wrench” so you may find other uses for them in the future.
- A decent wire crimper able to do anything 8 to 22AWG (or better)
- Decent wire strippers. A heat gun (or aim-n-flame) will help with heat shrink too.
Step 1: Battery Cell Balancing
If you’re patient, the preferred method for doing the initial battery cell balancing is to connect the batteries in parallel (all + on one side, all – on the other), set the bench power supply up, adjust it to 3.6V and max Amps (or really 80% of max, just to preserve the power supply), and let it go until the Amps drops to 0. In fact that’s what I went to do at first. However my cells arrived with 60% charge (which is pretty typical) reading about 3.25V, which means I needed to put 112A in each battery to fully charge them. Even at 10A, that’s 44 hours… and the thing about batteries is that as you get the voltage closer to the current will drop to keep the voltage constant.
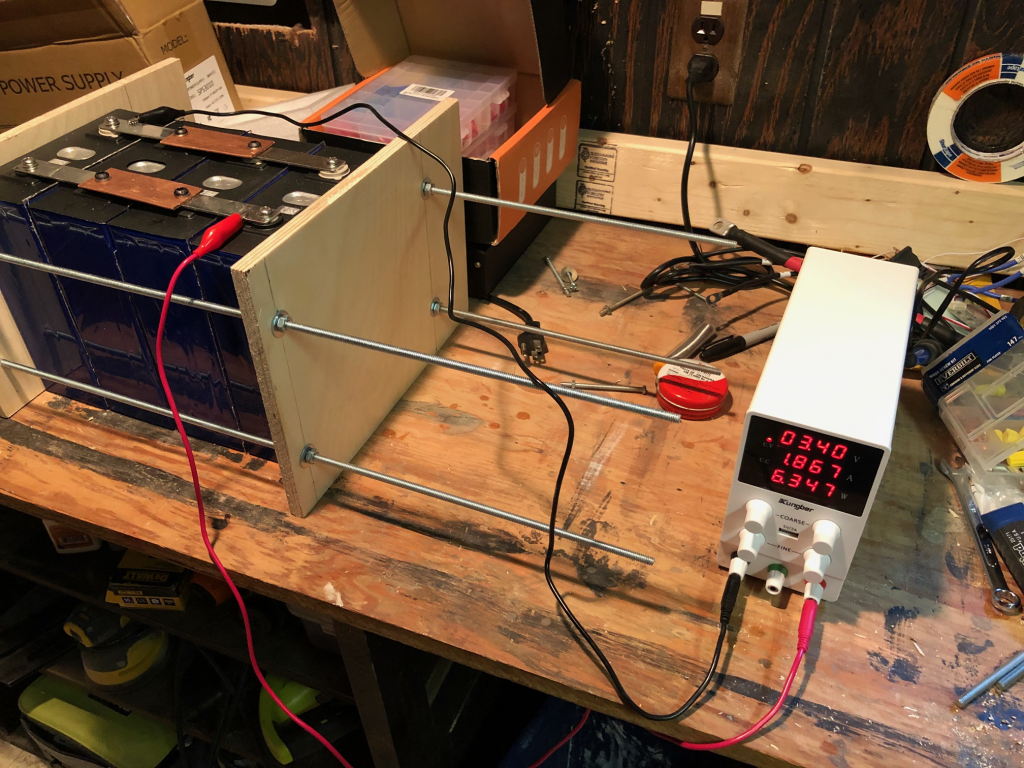
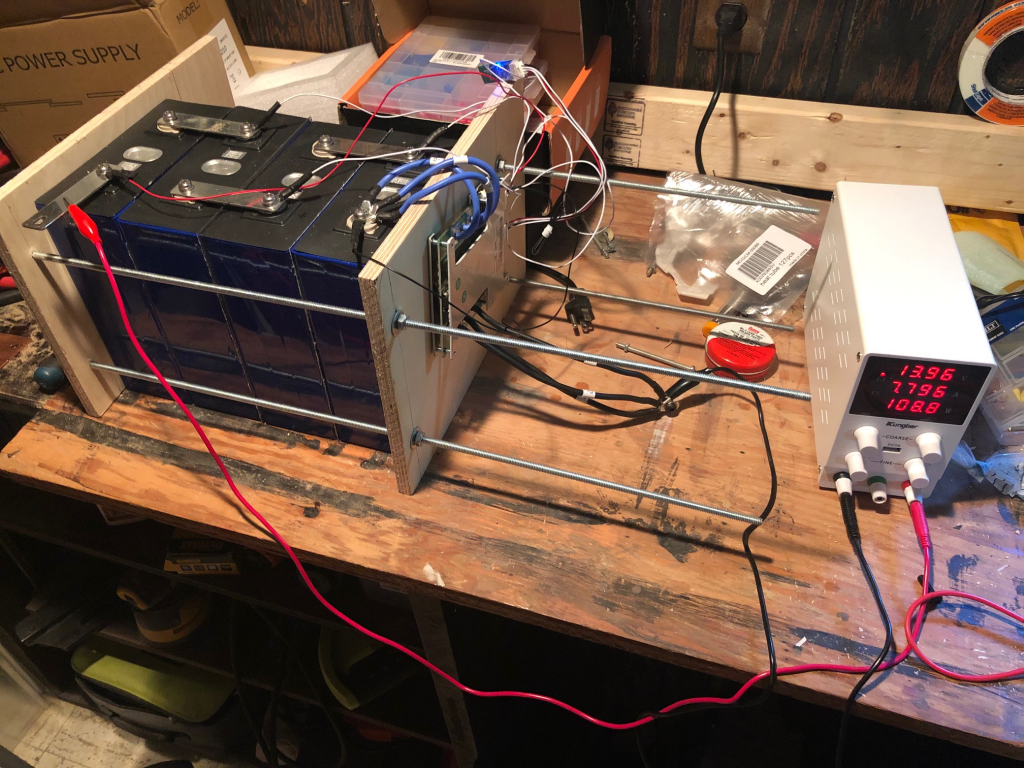
Power supply set to 3.4V and 8A, but once connected to cells which are 3.3V it switches from a constant 8A current to constant voltage, and the current drops off precipitously.
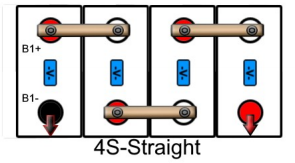
Rather than let the batteries sit on the charger for days, I decided to wire them in series, set up the BMS, and then apply a ~12V charge to the battery pack. This has the advantage of “only” needing to apply 112A to the pack, so it should take 1/4 the time. My expectation was that the cells were already matched (and probably balanced) within 0.01V so the BMS would take care of any balancing for me.
I set the power supply to 14V (which is 3.5V per cell) and 8A and let it run. Since I’m running through the BMS I suppose could just set it to 14.4V (3.6V per cell) or 14.6V (3.65V per cell) and count on the BMS to manage the cell voltage correctly, but since this is my first top-balance I wanted to give the BMS enough time to be able to balance the cells if they get too far out of whack as the voltage ramps up. I’ll repeat the process at 14.4V (3.6V per cell) once I’m sure the cells are balanced at 14V (3.5V per cell), or I’ll temporarily disconnect the busbars and individually top off a single cell if required.
Stay tuned for part 3
Pingback: LiFePO4 (Lithium) Battery Build (part 3) – rootflags.org