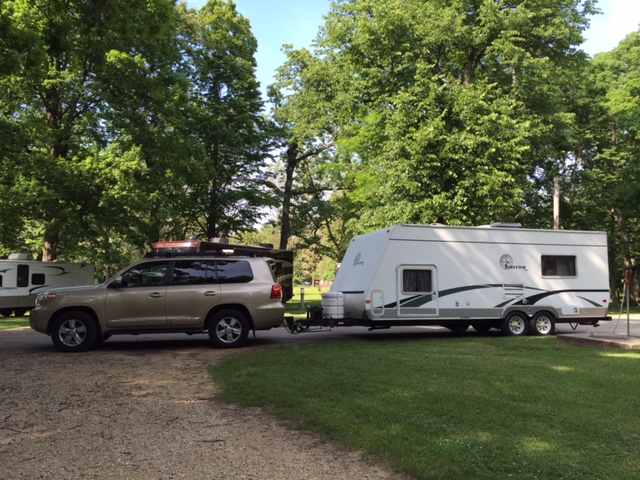
We towed our 5000 lb travel trailer with about 600 lbs of tongue weight for the first time with our 2013 Toyota Land Cruiser earlier this month, and with almost 4″ of sagging at the hitch I decided I needed to do something to level the vehicle. While I considered stiffer springs, I didn’t want a jarring ride for the majority of the time we drive unloaded in the city. After reading a number of posts, I decided to install a set of helper air bags in the rear. For a non-lifted (standard height) 200-series Land Cruiser, I purchased the Firestone 4164 air bag kit and a standard duty Air Lift 25804 air compressor from Amazon. For posterity, I thought I’d document the process here and on the iH8Mud forums.
Materials ($200-250):
- (1) Firestone 4164 air bag kit
- (1) Air Lift 25804 air compressor
- (1) Air Lift 21838 Union Tee
- (1) Tube of RTV Ultra-Black Sealant
- Big bag of heavy duty Zip ties
- Marine grease or silicone anti-seize compound
Installation:
Installation was pretty straightforward, as I generally followed the instructions posted at http://www.australianimages.com.au/project200/airbags.php. Installation of the air bags took about 2 hours, though admittedly I had access to a lift and a phenomenal mechanic to help me wrench. We did find ourselves straining to get the shock absorbers reattached and ended up using a ~5′ steel bar for added leverage to compress the rear springs better. About the only other modifications were that we didn’t bother to disconnect any breather hoses (there was plenty of slack), we didn’t tighten the KDSS valves back down until the vehicle was on the ground and had settled a bit, and I slathered the KDSS screws with marine grease before re-tightening them.
- Jack up the vehicle. Support with jack stands or use a lift if you’re lucky enough to have access.
- Loosen the screws on the KDSS system (located under the rear door on the driver’s side bolted inside the frame rail) 3 turns (no more!)
- Remove the rear tires
- Mark the spring, bump stop, and frame with chalk or a marker (optional but helpful)
- Remove the nuts from the bottom of the shock absorbers and remove the shocks from the lower mounts
- Remove the two bolts from each sway bar mount (left and right)
- Apply leverage to the rear end and remove the springs
- Remove the bump stops from the top of the spring. For stock suspension, cut off 4 stops with a sawzall (leaving just the base)
- Put the air bag inside the spring, connector facing upwards and put the remaining flat disc part of the bump stop back on top of the spring, aligned with your marking
- Fish the air line through the top of the bump stop and push it firmly into the air bag. Don’t worry, the bag’s internal compression fitting will secure it
- Fish the air line up through the spring mount and re-install the spring/air-bag/bump stop assembly.
- Push the air bag up to the top of the spring and run the air lines along the frame into the trunk compartment, ziptie-ing every 1-2′. You’ll need to poke a small hole in the rubber grommet in the right rear in order to fish the lines into the jack storage area. I chose to run both lines individually into the compartment and T them together there because I felt it was more easily accessible in case they leak and require replacement in the future, but you could also T the lines together underneath the vehicle and run a single line up to the compartment.
- Reinstall the sway bar, shocks, and tires
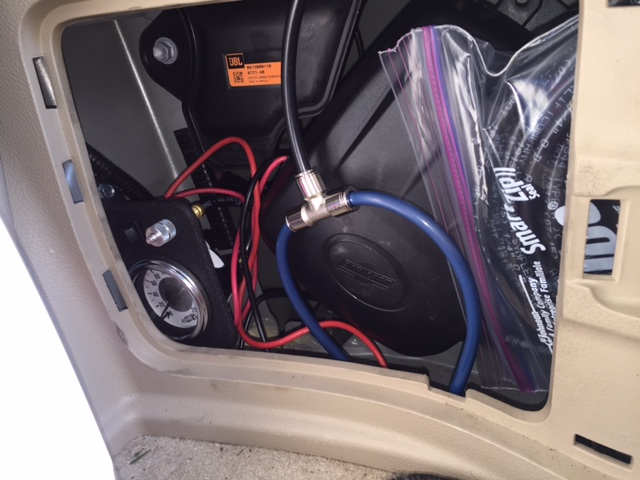
- Lower vehicle to the ground, bounce on the running boards to settle the suspension, then re-tighten the KDSS screwsThe compressor took about twice as long, though 2/3 of that time was spent trying to figure out how to mount the compressor and easily get power to it. I wanted the compressor hidden but also safe from the elements, so we ended up removing the jack and mounting the compressor at a 30-45 degree angle in the jack compartment. (At the moment the jack is now sitting in my trunk, though I will likely mount it under the hood in the near future as there’s lots of extra unused space).
- Remove the jack and retaining bracket.
- Determine how you will mount the compressor. We mounted it to 2″ wide x 10.5″ long steel bar, and we drilled and bolted that to the mounting holes for the jack retaining bracket. If I had to do this in the future I might buy and cut a piece of sheet metal and mount the compressor to that ahead of time.
- Mount the gauge to the body. We used the shortest self-tapping screws we could find, since the gas filler neck is on the other side of the metal.
- Following the air compressor installation instructions, and using the additional union T fitting you purchased, attach all the air lines
- Attach the negative (black) wire to a solid ground screw
- Run the positive (red) wire to the engine bay. We ran the line underneath the vehicle, though at some point in the future I will probably re-run a bundle of wire from the front to the rear through the door sills. Either way, make sure you put the 15 Amp inline fuse inline just before you tie the compressor into the battery!
- Flip the switch and pressure test.
I kept any extra tubing and fittings in a quart size ziplock bag in the storage compartment, just in case.
Experience:
Firestone recommends keeping a minimum of 5 psi in the air bags at all times in order to avoid pinching and damaging the air bag. They also state the maximum pressure of the bag is 35 psi, though I had to confirm with Firestone that you should load the vehicle first, then inflate to 35psi.
- Driving around town and on the highway with ~5 psi in the bags the ride was smooth and there was no discernible difference from stock.
- With 5 psi in the bags and a full 1400 lb payload (2nd row folded and 35 bags of mulch completely filling the 2nd row and trunk) the rear squatted a bit but the ride was unbelievably smooth. Keep in mind with the air bags inflated you’re basically resting on the bump stops at all times. The air bags are much more flexible than the bump stops, so it’s a smooth transition, but if you’re under load you really should have more than 5psi in the bags to avoid over-compressing the rear end and damaging the shocks or fenders.

- With 8-9 psi in the bags the truck feels stiffer when unloaded. When hitting bumps on the highway that cross the entire lane, I noticed a more pronounced hop from the rear (and actually a bit from the front too, which I’m thinking is due to the KDSS). While I’ve not driven in a Land Cruiser with upgraded (heavy duty) rear springs, I imagine the feeling is similar to a 1/2 ton vs 3/4 ton pickup.
- I ended up running 35psi in the bags when towing.
- With 5psi in the bags and about 200lbs of gear (and dog) in the trunk, the top of the rear end wheel well sits 21.5″ above the center of the axle.
- Adding about 600lbs of tongue weight on the trailer, the rear end sinks to about 19.5″.
- Setting up the weight distribution bars on the 4th link bumped it up to 20″.
- Increasing the bags to 35psi, the rear sits at just under 21″.
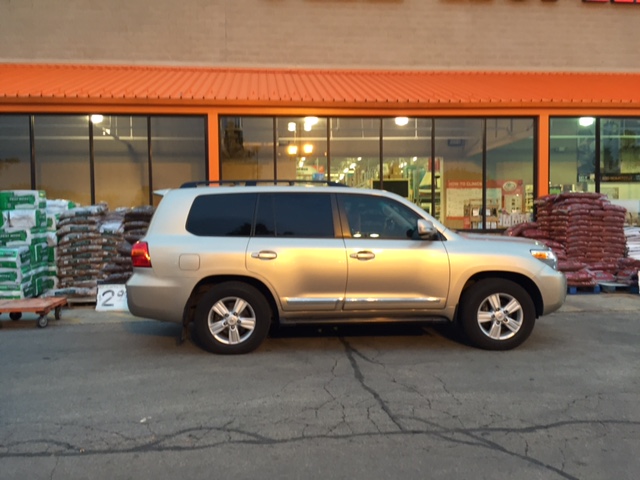
One other note is that the bags gave me about 1/2″ of lift in the rear. Since there was already about 1″ of rake front-to-rear, I may end up adding a set of 1″ front coil spacers up front in the future to better level the vehicle. Then again, when fully loaded the vehicle is pretty level now, so I may not mess with it.
With 35psi in the bags, the Land Cruiser towed like a friggin’ champ. The ride was very smooth, and with the anti-sway bar installed I had no trouble running 70+mph on the highway. All in all I’m very pleased with the setup.